

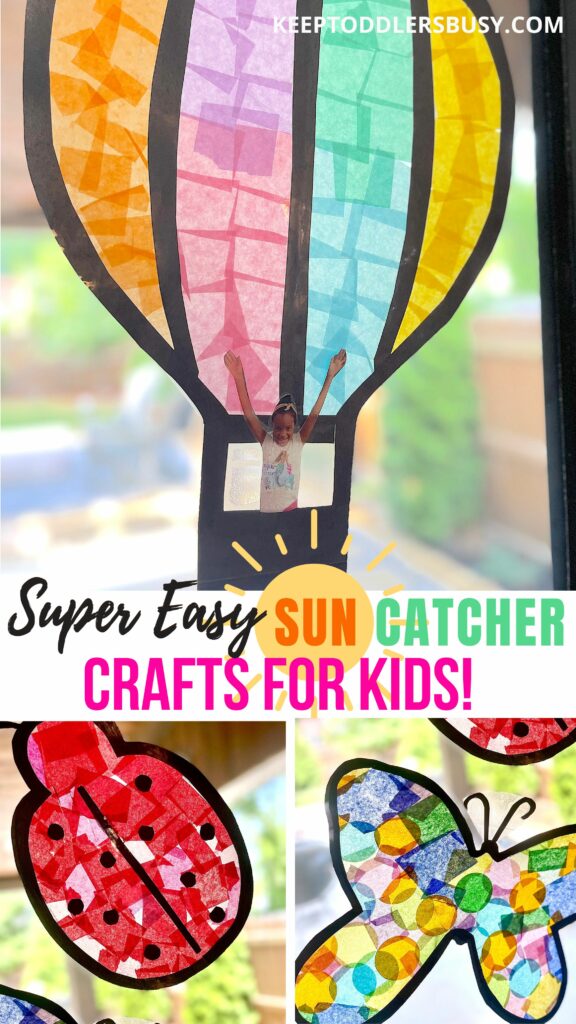
Super Easy Sun Catcher Craft The Kids Will Love
Okay y’all, let’s make some magic today with a super easy sun catcher craft that promises not only an interactive learning experience for your little ones, but also a really cute crafting touch to your home! Today, we’re creating butterfly and ladybug sun catchers that are as easy as pie to make. So, roll up your sleeves, and let’s get started!
But first, let’s talk about why we love sun catchers. A sun catcher is basically a decorative craft or object, usually made of transparent or translucent material, that catches and reflects light. This creates a beautiful, colorful effect when hung in a window, or glass door in my case, and it’s really a treat to have something beautiful in home that your kids made, and it’s catching the sun light in a beautiful way as well.
You and your child will have a blast. And if you enjoy this craft, you’re going to love our other exciting crafts and activities too, so don’t forget to follow me on TikTok and Instagram!
Super Easy Sun Catcher Craft
We hope you like the products we recommend. Just so you are aware, Keep Toddlers Busy may collect a share of sales from the links on this page. As an Amazon Associate, I earn from qualifying purchases. Read more about our links in my disclosure policy.
Easy Sun Catcher Craft Materials
- Clear Contact paper
- Tissue paper pieces
- Scissors
- Black construction paper
Easy Sun Catcher Activity Preparation
Now, let’s break it down step by step:
Shape It Out
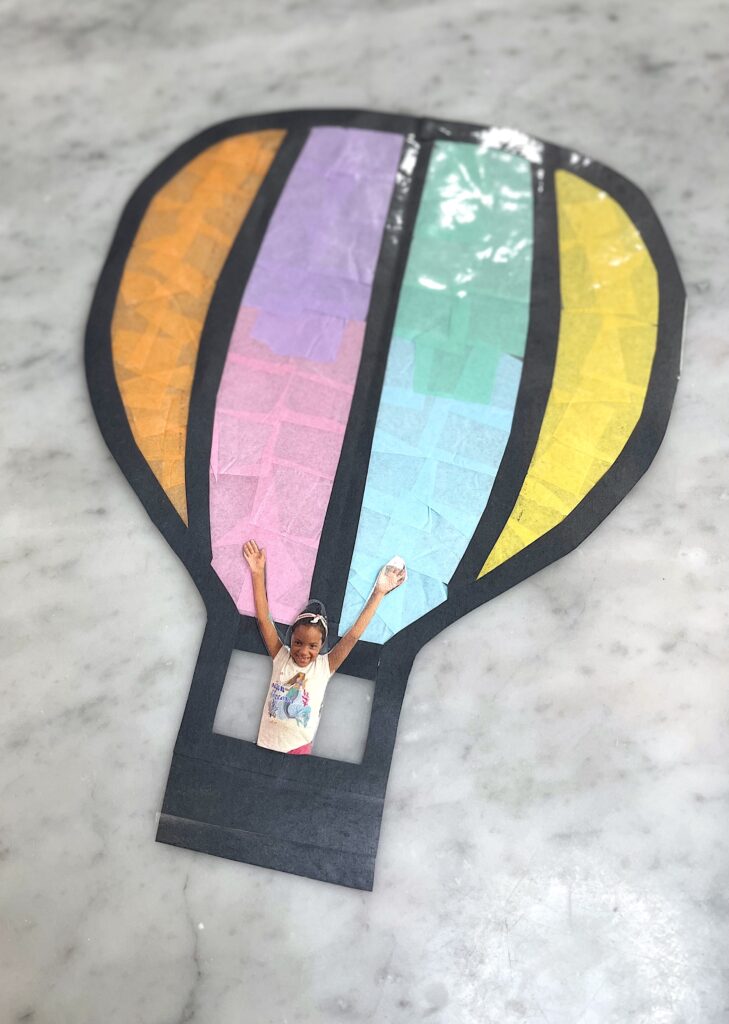
Start by cutting out the full shapes of the butterfly, hot air balloon, or the ladybug from the black construction paper. Remember, it doesn’t have to be perfect; part of the fun is seeing your child’s (or yours) unique interpretation of these creatures or shapes.
Outline Magic
Once the full shapes are cut, go back and cut out the outline edges of the butterfly and ladybug to make the shape outlines. Use the leftover paper to make the antennae for the butterfly, and the dots and line for the ladybug.
I also used the left over paper for the hot air balloon lines and basket area.
Stick It On
Next, lace the shape outlines and all the pieces on the sticky side of the contact paper. Make sure to leave enough room around each piece to fill it in later.
Fill It Up
Then, your little artist fill in the shapes with tissue paper pieces. Encourage them to mix and match colors to make their butterfly and ladybug as vibrant as possible.
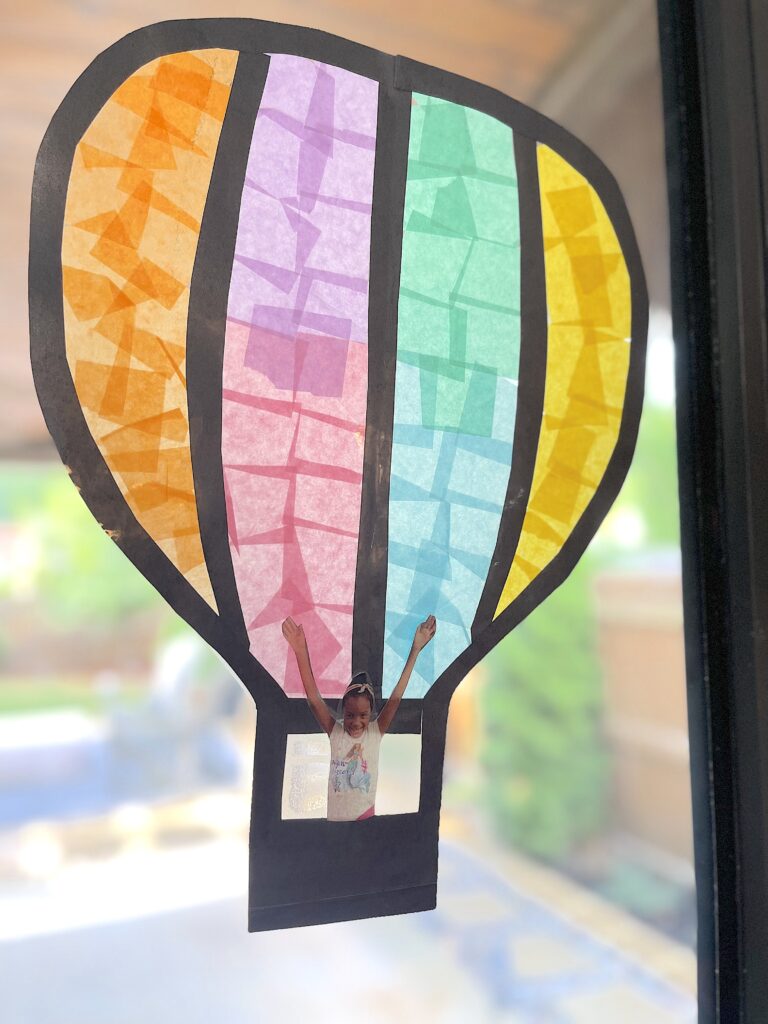
We did somewhat of a rainbow ombre effect with the hot air balloon.
Cover It Over
After your child has filled in their shapes, fold the contact paper over and seal it. This is a great step for developing fine motor skills, as it requires a bit of dexterity.
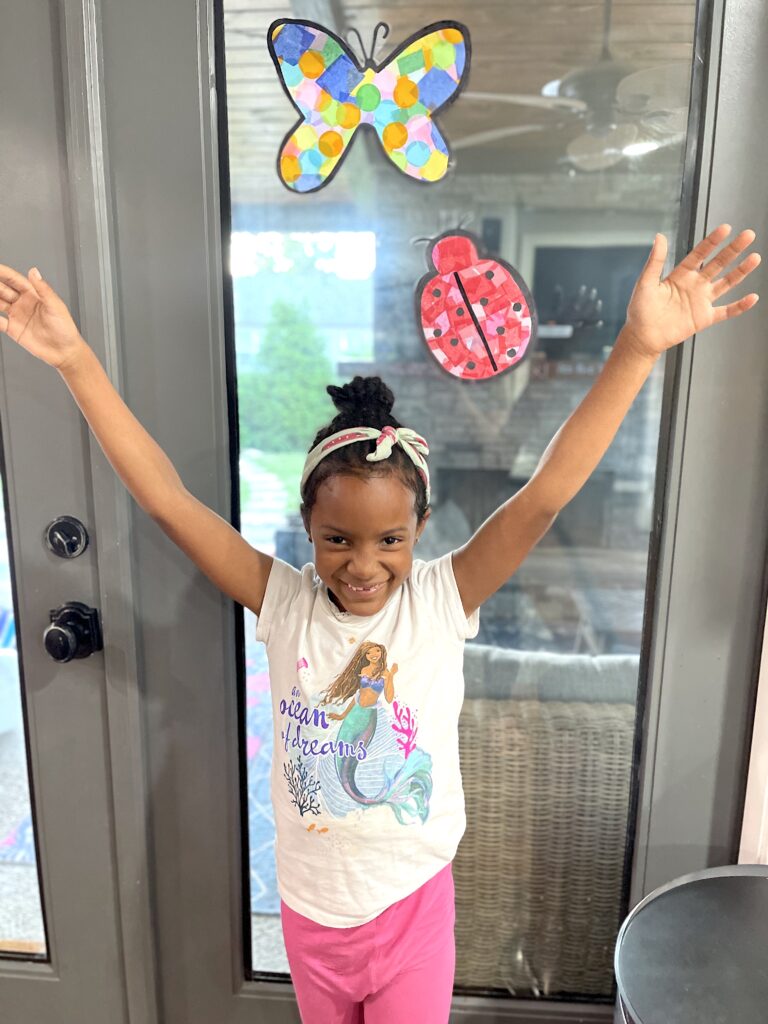
Make sure to include a picture of your little one for the hot air balloon before folding over!
Cut and Display
Now, all that’s left is to cut out your sun catchers and find a sunny spot to display them. You can hang these in a window to let the sunlight stream through and bring the sun catchers to life.
Take a look at how they turned out below!


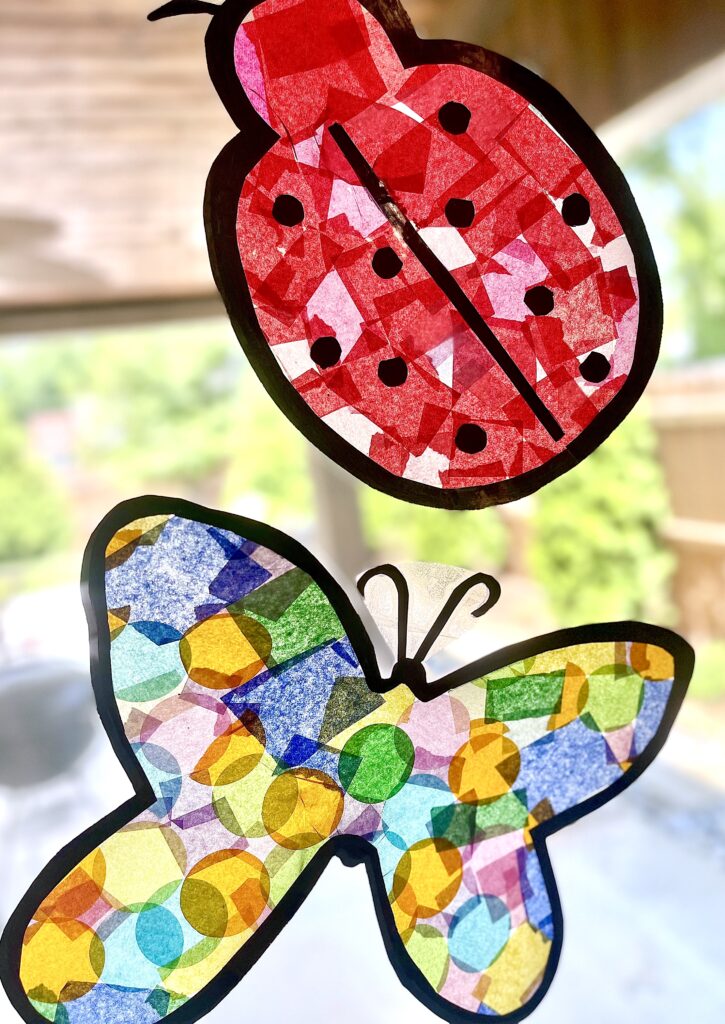
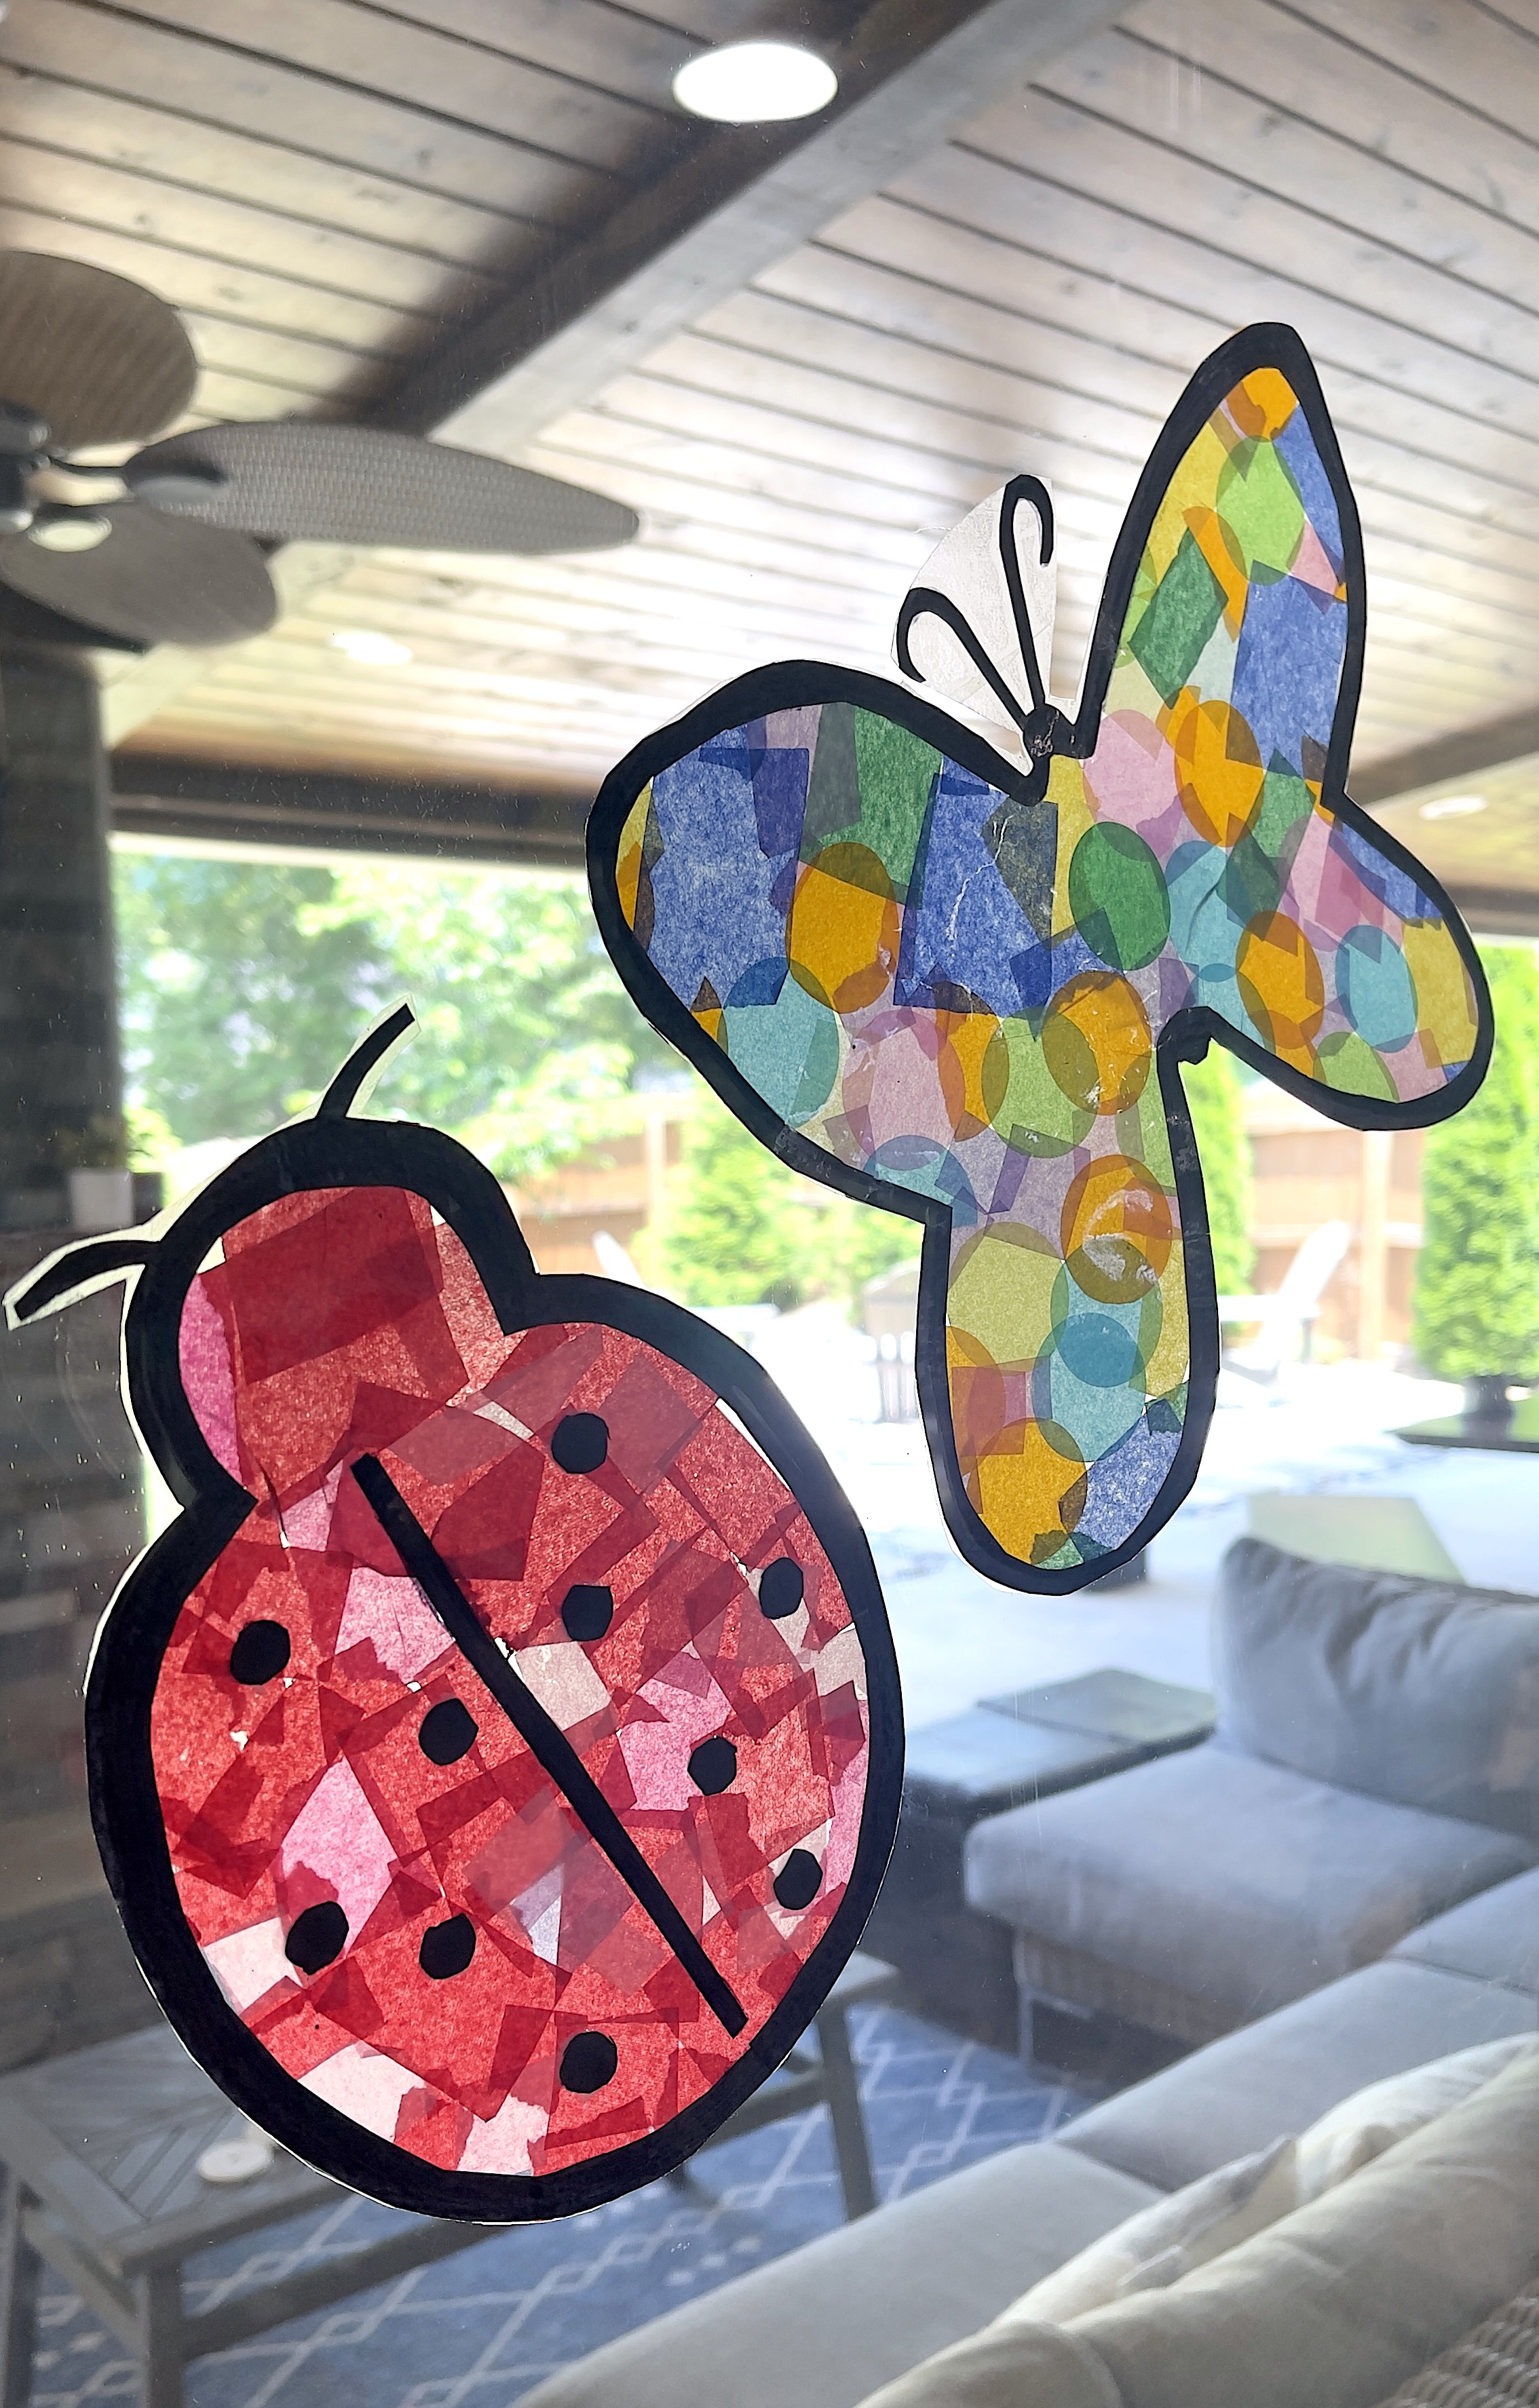

Voila! You now have beautiful butterfly and ladybug sun catchers, made with love. This craft not only keeps little hands busy but also teaches them about nature, color, and creativity.
Remember, it’s all about balance, fun, and learning. Share your crafty creations with us on social media, and inspire other moms with your handy work. After all, happy crafting is contagious!
Stay tuned for more craft ideas. Next time, we’ll take on summer crafts that keep your little ones learning and having fun. Happy crafting, moms!
Welcome to my blog! I am an activity mom of three and I have over 15 years of experience crafting, writing, designing and creating. My mission is to bring fun, balance and learning to your busy homes with activities, tips, inspiration, and organization!


2 Comments
Uzma Ajmal
I am a play group teacher. I love your ideas.
💕
Uzma
Kayla
Thank you so much!