

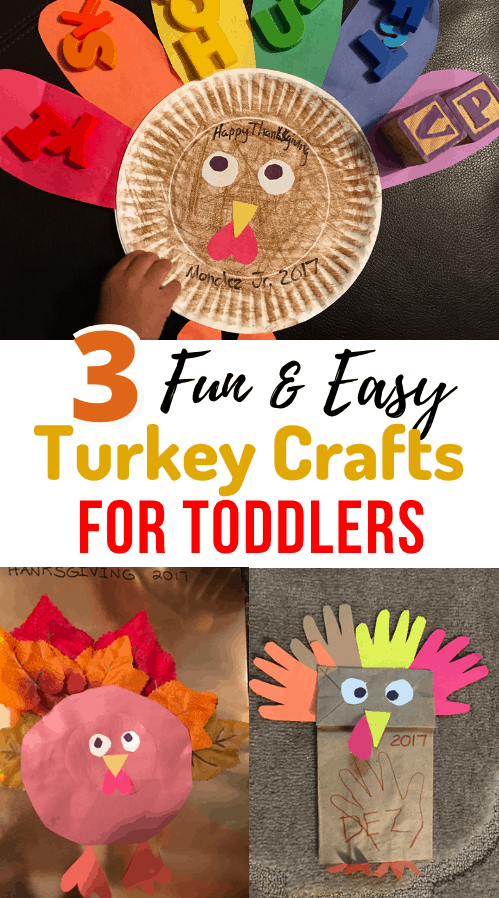
3 Easy Turkey Thanksgiving Crafts for Toddlers
Tis the season to be THANKFUL! Thankful for our family and friends, thankful for life, and thankful for our wonderful, excitable, tiring, loving, kids ?. One of the best parts about the holidays is doing crafts with the kids!
I just love to see my son’s face when we have the finished product and the memories last for years. We still have some time left to have fun with the kids for Thanksgiving! We still have a few more days so below I explain how we did three thanksgiving crafts for toddlers that your little one will LOVE. And the great thing about it is that all supplies can be found at the dollar store 😉
If you’ve visited my blog before or follow me on Instagram or Pinterest, you’ve probably figured out that I love kid’s crafts more than anything so feel free to check out more fall crafts for kids on Keep Toddlers Busy!
If you have other ideas or something you would like to see us do, please comment below this post.
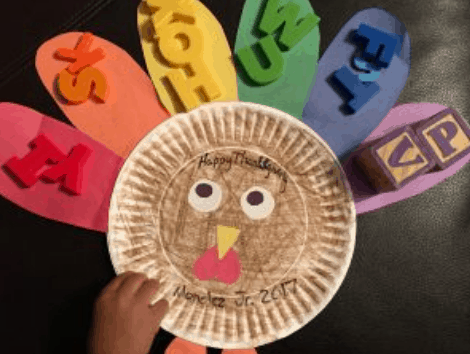
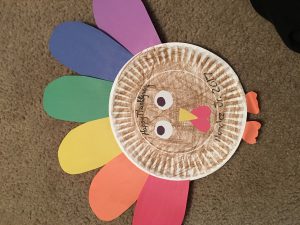
Rainbow Color Sorting Turkey
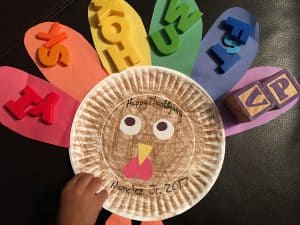
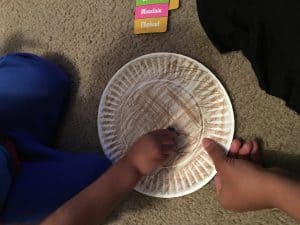
Allow your toddler to color two paper plates brown. Afterward I helped him to fill it in even more.
Next, help your toddler to apply stick glue onto the cut out face pieces. I was a little nervous about this part but he did soooo well! I suggest not doing it all at once, however. Glue, then stick, glue, then stick.
Next, help you toddler put glue on the bottom half of every feather and then paste them onto the back of the plate, along with the feet at the bottom.
Next, help your toddler put glue on the entire white side of the second plate, then secure the feather with the second plate so that the brown side of the plates are showing on the back and front.
Violà!! You have a Thanksgiving Rainbow Turkey!
Supplies (“Dollar Store Find”)
I personally already had all of these supplies in the house, but for those who don’t, the most you need to spend in $5.00 and you will get numerous activities from this supply list!
- Colorful Construction Paper
- Glue Stick
- Paper Plate
- Scissors
- Crayons (Brown)
Preparation
The preparation is easy, short and sweet. Obviously we don’t want our toddler handling scissors so this should be done ahead of time.
- Cut out two white circles for the eyes, and two smaller black circles for the pupils.
- Cut out the nose in the shape of a small yellow triangle.
- Cut out the turkey wattle in the shape of a red heart that you will turn upside down whet
- Cut out two orange turkey feet
- Put 6 sheets of construction paper together. I used rainbow colors in this example. (Red, orange, yellow, green, blue, purple) Next cut out the tail feathers all at once in the shape of a thick bat. Yes that’s my description lol.
We hope you like the products we recommend. Just so you are aware, Keep Toddlers Busy may collect a share of sales from the links on this page. Read more about our links in our disclosure policy.
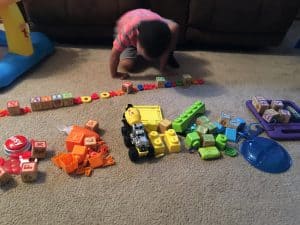
Now you can make this a color sorting activity that helps your toddler learn and master colors! Just grab whatever toys, colors, or supplies you have laying around.
Bonus
Color sorting learning games can be done at ANY TIME using toys you already have in the house. Take a look at an activity my son and I do on a regular basis ?
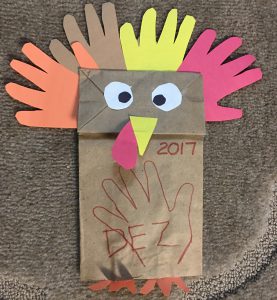
Paper Bag Hand Print Turkey
Supplies (“Dollar Store Find”)
I personally already had all of these supplies in the house, but for those who don’t, the most you need to spend in $4.00 and you will get numerous activities from this supply list!
- Colorful Construction Paper
- Glue Stick
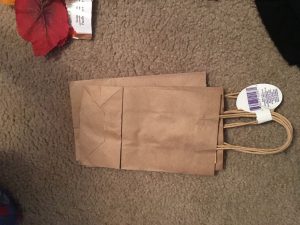
- Paper Bag
- Scissors
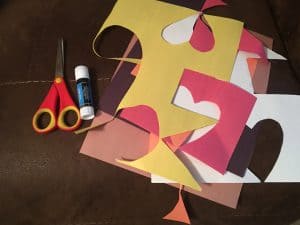
Preparation
The preparation is easy, short and sweet. Obviously we don’t want our toddler handling scissors so this should be done ahead of time.
- Cut out two white circles for the eyes, and two smaller black circles for the pupils.
- Cut out the nose in the shape of a small yellow triangle.
- Cut out the turkey wattle in the shape of a red heart (or any shape you want) that you will turn upside down when gluing.
- Cut out two orange turkey feet
- Put 4 sheets of construction paper together. Next, outline your child’s hand with a pencil and then cut the hand prints outs.
Keep Toddlers Busy is a participant in the Amazon Services LLC Associates Program, an affiliate advertising program. As an Amazon Associate, I earn from qualifying purchases. Read more about these links in my disclosure policy.
Putting It All Together
This step depends on your toddler’s age. I involved my son, but also helped him along the way.
- Help your toddler to apply stick glue onto the cut out face pieces. I was a little nervous about this part but he did soooo well! I suggest not doing it all at once, however. Glue, then stick, glue, then stick.
- Next, help you toddler put glue on the bottom half of every HAND PRINTS and then paste them onto the back of the PAPER BAG, along with the feet at the bottom.
- Next, allow your toddler to decorate the front however you want!
- Violà!! You have a Paper Bag Hand Print Turkey!
Thanksgiving Leaf Turkey
Supplies (“Dollar Store Find”)
I personally already had all of these supplies in the house, but for those who don’t, the most you need to spend in $4.00 and you will get numerous activities from this supply list!
- Colorful Construction Paper
- Glue Stick or school glue and/or a stapler
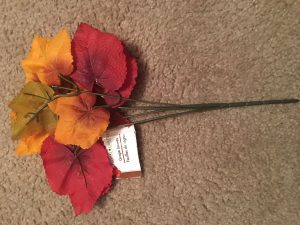
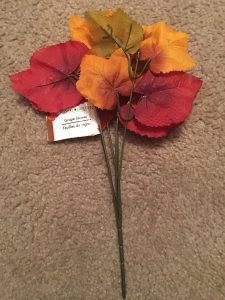
- Autumn Leaf Bouquet (or use real leaves)
- Scissors
- Metallic Paper
Preparation
The preparation is easy, short and sweet. Obviously we don’t want our toddler handling scissors so this should be done ahead of time.
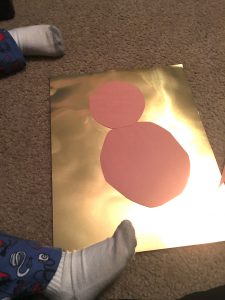
- Cut out a Brown circle to use for the turkey’s body and a smaller circle to use for its head.
- Cut out two white circles for the eyes, and two smaller black circles for the pupils.
- Cut out the nose in the shape of a small yellow triangle.
- Cut out the turkey wattle in the shape of a red heart (or any shape you want) that you will turn upside down when gluing.
- Cut out two orange turkey feet
- Cut the leaves off of the Autumn bouquet. (Or you can use real leaves!)
Putting It All Together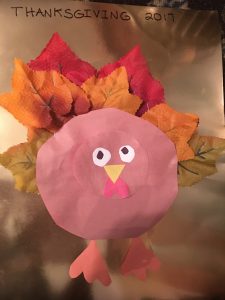
This step depends on your toddler’s age. I involved my son, but also helped him along the way.
- Help your toddler to apply stick glue onto the cut out face pieces and the body.
- Next, help you toddler put glue on the bottom half of every LEAF and then paste them onto the back of the TURKEY BODY. Note: The Leaves were thick so I ended up having to staple them down as well it it worked out GREAT.
- Next, allow your toddler to decorate the front however you want!
- Violà!! You have a Thanksgiving Leaf Turkey!
I hope you and your tots enjoys these activities and make sure you put dates on them! If you like these activities, let me know below! Do you have Thanksgiving crafts for toddlers on your to-do list? Share below!
Also, remember to sign up for your FREE weekly activities planner on the top or the right side of the page and check out my printables page
Welcome to my blog! I am an activity mom of three and I have over 15 years of experience crafting, writing, designing and creating. My mission is to bring fun, balance and learning to your busy homes with activities, tips, inspiration, and organization!


8 Comments
Suzanne Stoddart
Hi Kayla,
These ideas are so cute!! My grandson is almost two and I’d love to try these. Might be a challenge though. His attention span is about 10 seconds lol. I will definitely forward your website to my daughter as she also just had her second child. So many good ideas!
Blessings on you,
Suzanne
Kayla
Thank you! I hope your grandson enjoys them. Some of the activity is done by mom or dad, but you can allow your child to participate on the some of the easy parts that don’t take to long and the evidence will last for years lol.
Maurice Jackson
I can do this. I mean my grandchildren and I can do this. They are of age where they do everything except the use of scissors. But the benefit for the adult is all of the projects can keep the child occupied or you can make it a bonding experience . Thanks.
Kayla
Exactly Maurice. They can learn, be occupied, and have fun. I call that a win lol. Enjoy!
Alex
My sister is the mother to two young-uns, ages 5 and 7, and she sometimes has trouble keeping them busy. With the holidays fast approaching, this sounds like an excellent option to keep their attention occupied. I will share this with her. Thank you so much and I hope you make it a great day!
Kayla
Your welcome Alex! These activities are great for all ages so I hope they enjoy!
Liz
your website is amazing. I left a comment for you. I love what you’re doing. It is so important to keep our kids’ minds busy with creative learning and play. I was an early childhood ministry director and always loved coming up with curriculum and crafts. Congratulations to you for all your accomplishments.
Well done.
Kayla
Thank you so much Liz! If we focus on our children then the future is bright. I will continue to make this site a place that can promote happy and healthy kids!