A DIY Valentine’s Day Gift You’ll Love: Giant Ring Pop
Valentine’s Day is the perfect occasion to let creativity shine, especially when it comes to gift-giving for our little ones. This year, I decided to embark on a unique crafting journey—making a giant ring pop DIY Valentine’s Day Gift using items solely from the Dollar Tree. Not only will this be a delightful surprise for my daughter, who adores everything glitzy, but it will also bring a big smile to my son’s face with the added fun elements I included.
For more Valentine’s Day gift ideas, also check out my post on the perfect Valentine’s day gift baskets!
The Story Behind this DIY Valentine’s Day Gift
Have you ever thought about crafting something truly unique for Valentine’s Day? This year, I did just that. I embarked on a creative journey to make a giant ring pop for my kids. Why a ring pop, you ask? Well, it all started with my daughter’s love for all things glam. She adores girly glitz, and I wanted to create something that would make her eyes sparkle.
Inspiration and Planning
My son, on the other hand, is full of playful spirit. I wanted to include his interests too. So, I thought, why not combine both their passions into one fun project? Valentine’s Day is the perfect occasion to let creativity shine, especially when it comes to gift-giving for our little ones.
Shopping Spree at Dollar Tree
To bring this idea to life, I took a trip to the Dollar Tree. It’s amazing what you can find there! Every single item for this project came from that store, making it affordable and accessible.
DIY Valentine’s Day Gift
Giant Ring Pop Supplies You Will Need
Let’s dive into crafting a giant ring pop for your kids’ DIY Valentine’s Day gift. The best part? Every single item comes from the Dollar Tree. If you have multiple kids, this is a budget-friendly project that’s perfect for you!
We hope you like the products we recommend. Just so you are aware, Keep Toddlers Busy may collect a share of sales from the links on this page. As an Amazon Associate, I earn from qualifying purchases. Read more about our links in my disclosure policy.
- Colorful plastic bowls or cups (WAVY)
- Craft glue or a hot glue tool
- A paper plate or Cardboard for the ring base
- Paint or markers for customization
How-To: Crafting the Giant Ring Pop DIY Valentine’s Day Gift
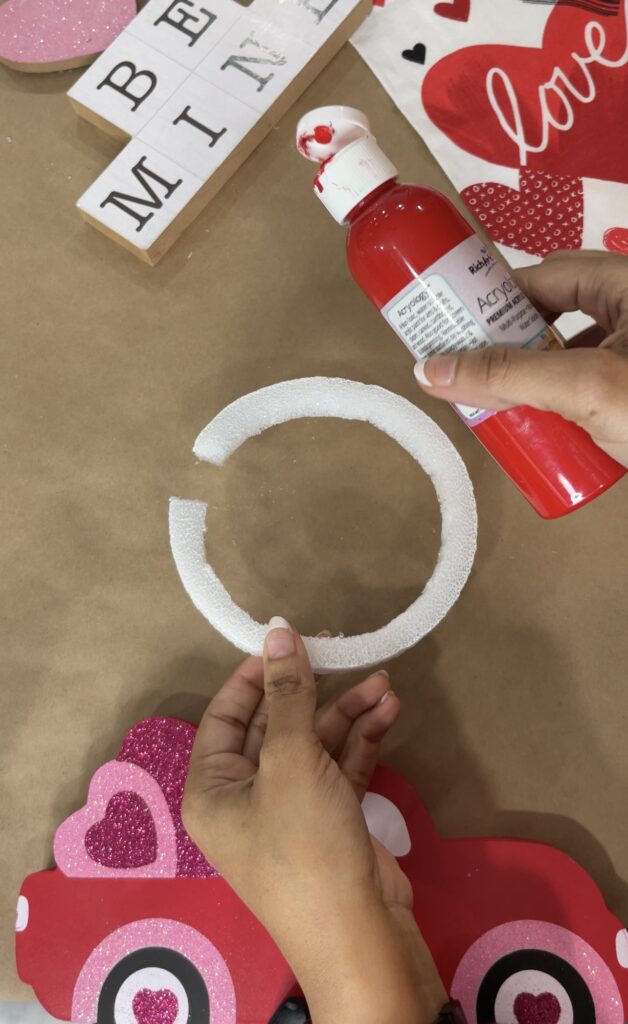
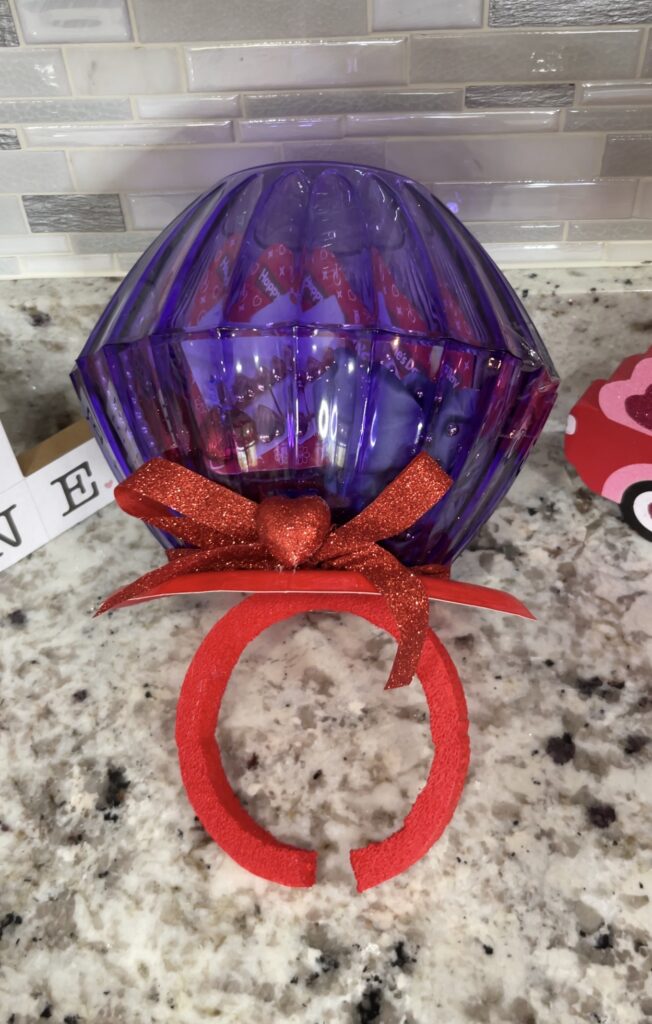
- First, You Can Prepare the Base: Cut a piece of cardboard into a ring shape. This will be the base of your giant ring pop.
- Next, Assemble the Top: Use a plastic cup for the top of the ring pop. Make sure it’s a different color from the base for contrast.
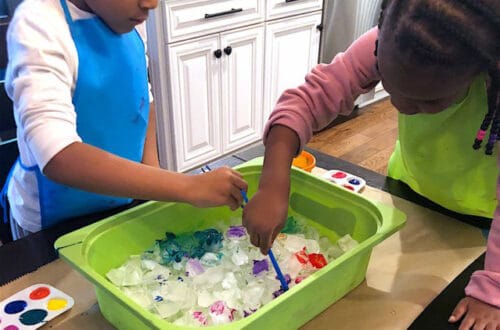
- Now, let’s get creative! Fill the container with unique small trinkets or toys. My daughter adores girly glitz, so I chose sparkly items. For my son, I picked some fun little cars.
- Then Decorate: Let your imagination run wild! Add glitter, stickers, or any other embellishments.
- Make Sure To Secure the Pieces: Use the glue to attach the top to the base securely. Safety first—watch those fingers!
- Last, You Can Personalize: Add custom colors or names to make it truly special.
- And there you have it! A personalized, giant ring pop that’s sure to delight. It’s affordable, easy to create, and the perfect surprise for your little ones!
This craft project has become a family tradition. It’s not just about the final product but the memories we create along the way. The smiles on my kids’ faces are worth every minute spent crafting. And who knows, maybe this will inspire you to start your own family tradition!
“Valentine’s Day is the perfect occasion to let creativity shine, especially when it comes to gift-giving for our little ones.”
Check out the how-to video from my Tiktok account and photos below!


@kaylahollomon Make a GIANT DIY Ring Pop Valentine gift for your kids with me! 💍Materials: 2 large plastic candy dishes (bowls) Paper plate Styrofoam cutout Hot glue tool Scotch tape for the bowls Water Paint of your choice Filling of your choice! #valentinesdaybasket #valentinesdaygift #valentinegiftsforkids #ValentinesDay #valentine #valentinesdaygiftideas ♬ Cupid – Twin Ver. (FIFTY FIFTY) (Sped Up Version) – FIFTY FIFTY
Things to Remember when Making Your Valentine Ring Pop
Select Colors for Top and Bottom Sections
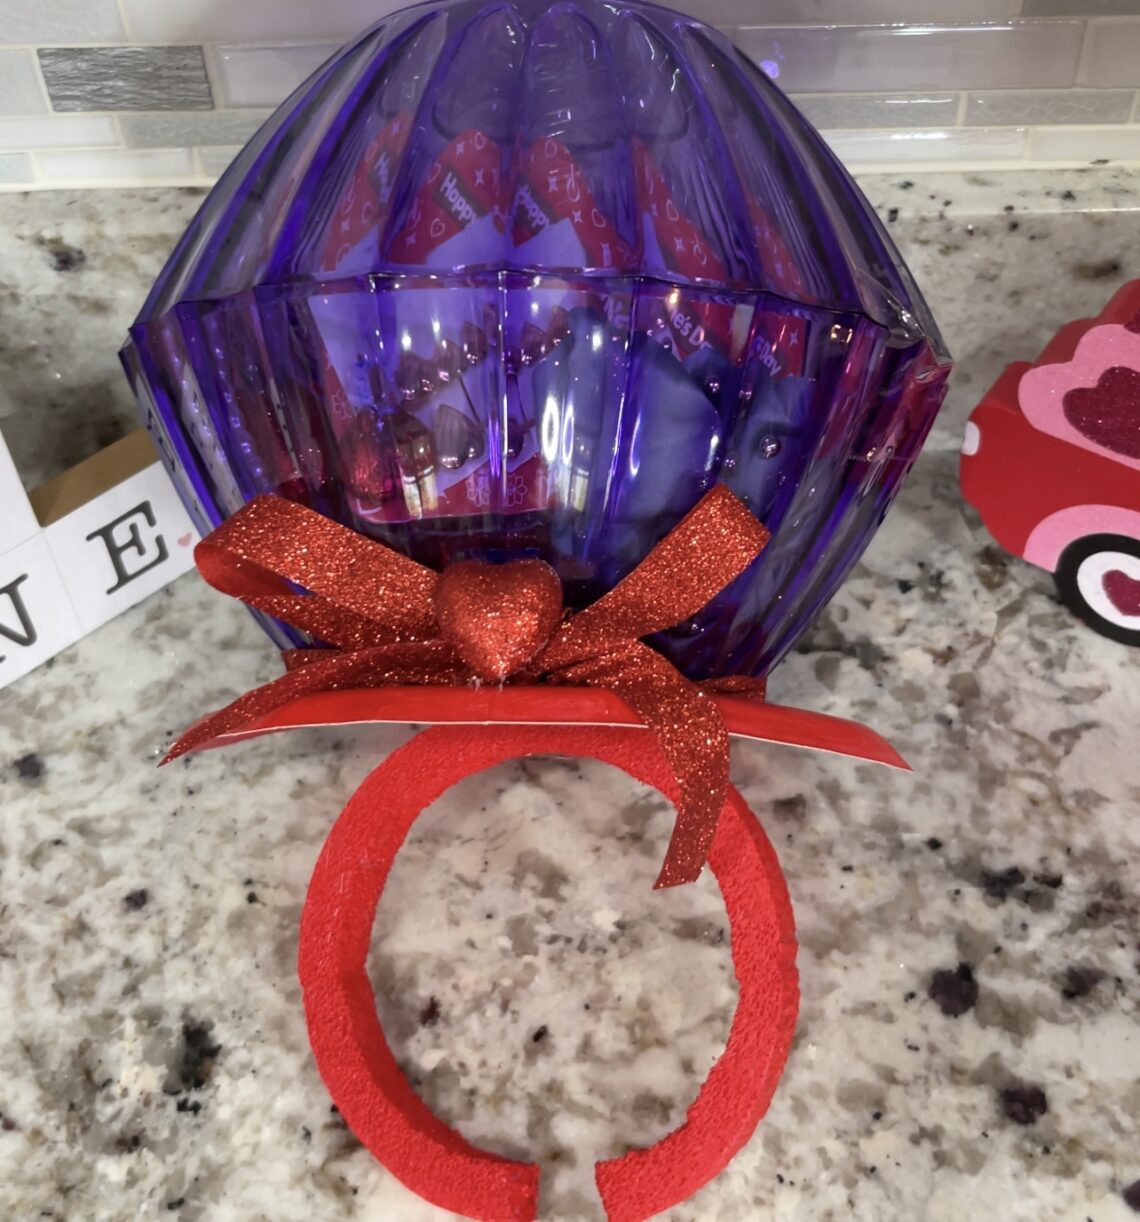
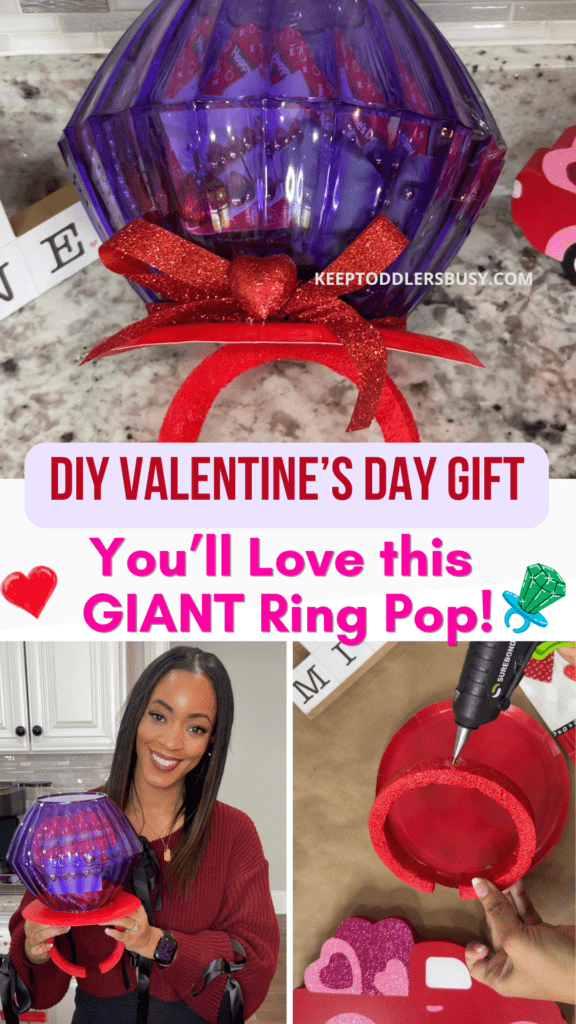
First things firstThe top and bottom sections of your giant ring pop should be in contrasting colors so that it resembles the actual ring pop. Why? It adds a fun, vibrant look. I chose a purple top and a red bottom. What will you choose?
Use the Hot Glue Gun for Assembly
Safety first! Always be careful when using it. Apply a generous amount of glue to the bottom section. Then, press the ring base onto it. Hold it for a few seconds to ensure it sticks well and let it dry
Secure and Check for Stability of your DIY Valentines Day Gift
Ensure everything is stable. Give it a gentle shake. If it feels loose, add a bit more glue. You want it sturdy enough to handle all the fun ahead!
Use scotch tape of packing tape to close the bowls so that it can be easily opened by your kiddies.
Adding a Personalized Touch
When it comes to creating memorable gifts for kids, adding a personalized touch can make all the difference. Why settle for ordinary when you can make it extraordinary? Let’s dive into some creative ideas that can bring smiles to little faces.
Consider Children’s Favorite Colors and Themes
Every child has their own unique preferences. My daughter, for instance, loves girly glitz and glam, while my son enjoys more adventurous themes. Think about what colors and themes resonate with your child. This simple step can transform a gift into something truly special.
Incorporate Small Surprises
Who doesn’t love a surprise? Tuck in a few unexpected treats or toys that will delight and engage. Children appreciate the anticipation of surprises, and it adds an extra layer of excitement.
Write a Personal Note for Each Child
A heartfelt note can make a gift more meaningful. Write a short, sweet message that expresses your love and appreciation. It’s a small gesture with a big impact.
Mix Different Textures and Materials
Mixing textures and materials can make the gift visually appealing and fun to touch. Consider soft fabrics, shiny papers, or even glittery elements. It’s like creating a mini adventure for their senses!
Utilize Creative Wrapping
Creative wrapping can turn any gift into a masterpiece. Use bright papers, ribbons, or even craft paper that your child can color on. Make it as unique as the gift inside.
Ensure The DIY Valentine’s Day Gift is Easy for Little Hands to Open
While we want the gift to look beautiful, it’s important to ensure it’s easy for little hands to open. Avoid excessive tape or complex knots. Keep it simple yet secure for your Valentine crafts!
By following these steps, you can create a gift that is not only visually appealing but also filled with love and thoughtfulness.
“Every single thing shown here comes from the Dollar Tree, so if you have multiple children, this is perfect.”
So, grab your supplies and get crafting. It’s more than just a project—it’s a memory in the making.
This DIY Valentine’s Day Gift is not only customizable but also promotes creativity and hands-on fun. It’s amazing how simple materials can transform into a memorable keepsake. Plus, it’s easily adaptable for different occasions. Whether your child loves girly glitz or something more rugged, you can tailor each ring pop to their preferences. Isn’t it wonderful how a little creativity can go a long way in making Valentine’s Day special?
In the end, this craft isn’t just about the final product; it’s about the joy and bonding that comes with creating something together. So, what are you waiting for? Let’s get crafting!
Are your kids going to help? Here are Some Tips for a Safe and Enjoyable Crafting Experience
Crafting with kids can be a delightful adventure. But, like any adventure, safety is key. So, how do we make crafting both fun and safe? Let’s dive in!
Ensure Adult Supervision
First and foremost, adult supervision is a must. We all know how curious kids can get. Having an adult around ensures that there’s always someone to guide them, especially when using tools.
Use Suitable Tools for Age
Also, not all tools are created equal. Choose tools that are appropriate for your child’s age. For instance, safety scissors for the little ones and glue sticks instead of hot glue guns. Speaking of hot glue, I remember making a giant ring pop for my kids. I used a hot glue tool, but of course, I handled it myself.
Set Up a Designated Crafting Area
Having a designated crafting area keeps things organized. It also helps in managing the mess. Plus, it gives kids a sense of their own creative space. Think of it as their crafting kingdom!
Have a First-Aid Kit Handy
Accidents happen. A small cut or a scratch can occur. That’s why having a first-aid kit nearby is always a smart move. Better safe than sorry, right?
Educate Children on Safety Measures
Teaching kids about safety measures is crucial. Explain why certain tools are off-limits or why they need to be careful with others. It’s like teaching them the rules of a game.
Encourage Sharing and Teamwork
Crafting is not just about creating; it’s about collaboration. Encourage kids to share supplies and ideas. This fosters teamwork and makes the experience more enjoyable for everyone.
In conclusion, crafting is a wonderful way to bond with children. By ensuring safety, selecting age-appropriate tools, and fostering teamwork, we create not just crafts, but memories. Let’s craft safely and joyfully!
Learn how to make a giant ring pop for DIY Valentine’s Day gift with Dollar Tree materials—creative, cost-effective fun for multiple kids.
Welcome to my blog! I am an activity mom of three and I have over 15 years of experience crafting, writing, designing and creating. My mission is to bring fun, balance and learning to your busy homes with activities, tips, inspiration, and organization!


You May Also Like
7 Amazing Paper Mache Projects For Kids That Will Wow Them
10 Awesome Diversity Activities For Kids To Teach Awareness