

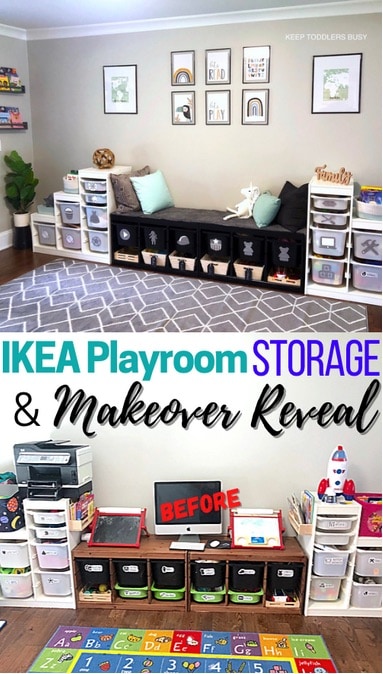
Our IKEA Playroom Storage Makeover Reveal
Hi Everyone! If you’ve visited my blog before or follow me on Instagram or Pinterest, you’ve probably figured out that I love kid’s crafts and I also have a love for kid’s decor and design as well. This includes includes colorful kids playroom ideas and much more.
Well today I’m super excited to show you part one of our IKEA playroom storage makeover! It actually takes a lot of work to change up an entire look!
We moved in our new house about a year ago and planned to have our playroom room in the big room upstairs (also doubling as a movie/gues room lol!), but Covid-19 changed our plans. For one, we needed to have my husband upstairs away from everyone, so he could work peacefully from home.
Also, I decided I would plan to have a study area in the playroom that they can grow into over the years. Right now it would function as a classroom as well for virtual learning, and we would move it downstairs.
I think it all worked out great and when the storage side of the playroom was done, I literally did a happy dance. I b-boxed my own beat and started dancing, that how much I love it! 🙂
Designing the kids’ space was so fun! I think I’m hooked. This budget-friendly mostly IKEA playroom is one of our favorites spots in the house.
Tips on Designing a Fun and Functional Playroom
Before I share our playroom makeover, I thought I would share some tips on how to get started. During the process, I started realizing that it may not like like it, but I took on a big job that takes time and preparation. I absolutely loved every minute of it and was up to the task of staying on budget, but a plan was necessary.
- Add color with accessories so that the playroom can grow with your child. Then when the kids style and choices evolve, you can switch out the accessories.
- Create separate areas for multiple activities- when you put together areas that are geared toward different activities, and the kids are able to move, then the kids are more likely to be occupied for a longer period of time without uttering the dreaded “I’m bored”.
- Storage, Storage, Storage! And did I say storage. This one is pretty self explanatory but including dedicated spaces to store toys allows for a cleaner and larger play space and a much easier cleanup process on a daily basis.
- Write down preferences and desire for the playroom ahead of time. Plan out how you want to achieve your goals.
- Be creative- use floating shelves to store books and wall decals to add decor. Wall space is completely usable space!
- Provide comfy seating somewhere in the playroom.
- Provide an area where the kids are able to work on crafts such as a craft table of desk.
We hope you like the products we recommend. Just so you are aware, Keep Toddlers Busy may collect a share of sales from the links on this page. Read more about our links in my disclosure policy.
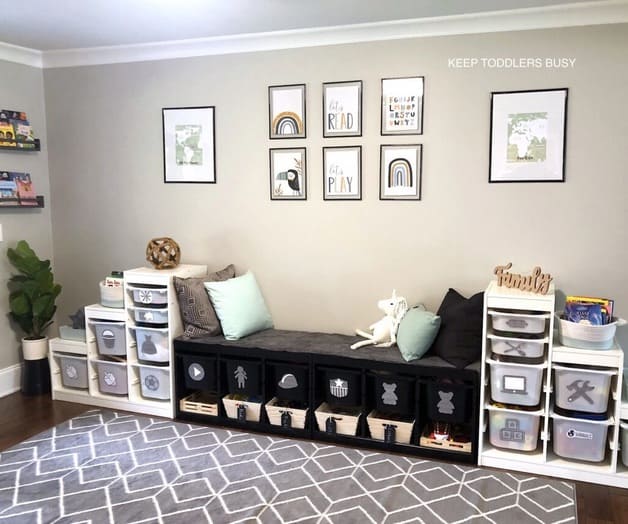
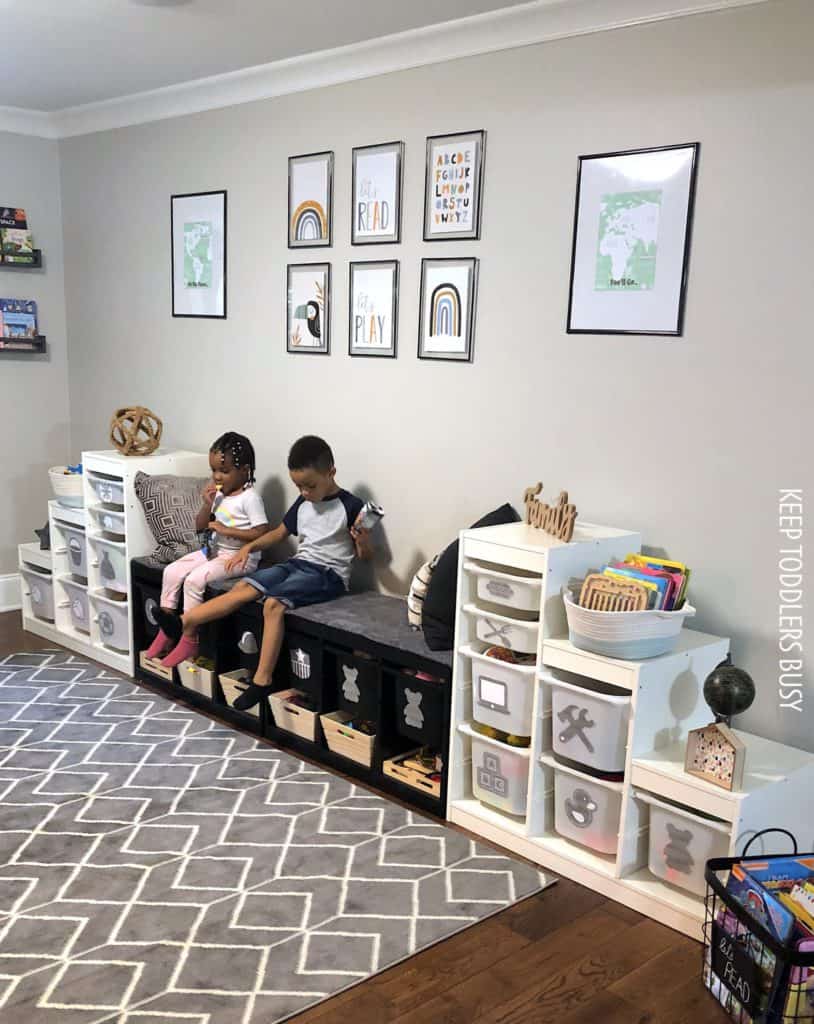
Our IKEA Playroom Storage Design
This space that will is eventually intended to be a place to play and study and is right off of the kitchen. (The study will be in part two coming soon!) This is not a super large space, but its just enough room for the children to have some fun, play, stretch out, study, and of course give me some space. 🙂
FYI, if you want more decor ideas, check out my kid’s decor page! Also check out a great post on how to create a playroom that will grow with your child.
Planning for the Playroom
The first step for me was getting the plan together.
My 5 year old son recently started virtual kindergarten at home this year and I also have my three year old, so our goal was simply to allow both of them to have a desk space to work on and also have a way to access a good amount of toys when my three year old gets bored.
I love blacks, whites, and grays, with wood. You will see that style in most of the house. Since the kids space is downstairs, I decided to keep that style, but add some touch of color for the fun. I will probably add a few more colorful features to decorate.
I will also show you below how I stuck to a budget, and shopped at IKEA and Target (and repurposed and reused), to achieve this look. I really hope that you enjoy this look into our kid’s space!
Here are the things we wanted for the room during the planning stage:
- Two desks and homeschool supply storage for the kids to work (shown in part 2)
- Ample storage for toys
- A comfy place for reading
- Extra Storage for books
- Soft flooring for floor play
- Accessories
Everything else stayed the same. The wall color is a neutral Repose Gray that we used throughout the house and the floors are an awesome engineered wood that was here when we bought the house.
Now to be fair, the initial move-in playroom was great to have and we were ABSOLUTELY thankful for it, but overall it just wasn’t want we wanted and envisioned for the new house. Check out the difference below!
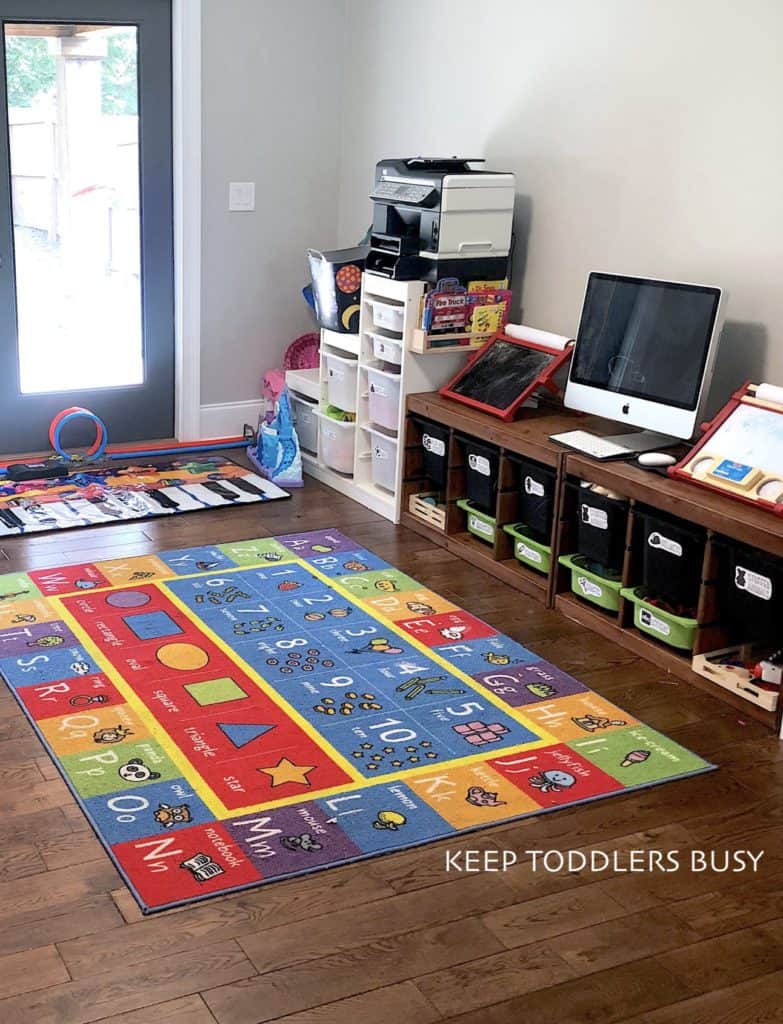
1/31/21 UPDATE! I changed a few things. Can you spot it?
Painting the IKEA Shelves
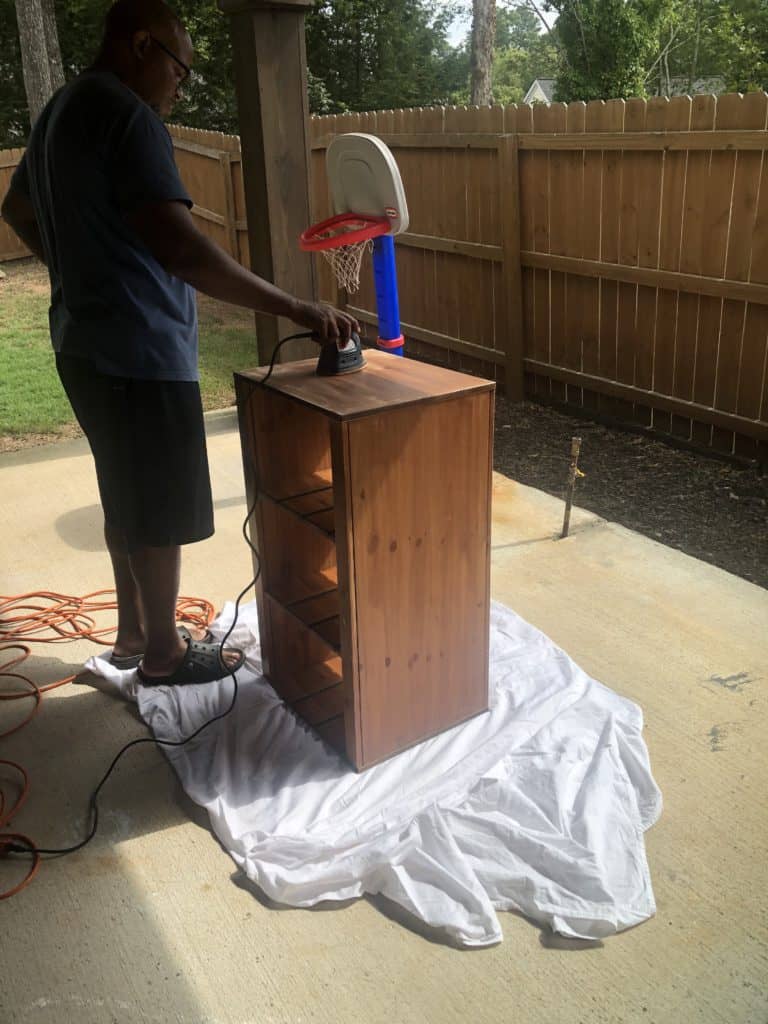
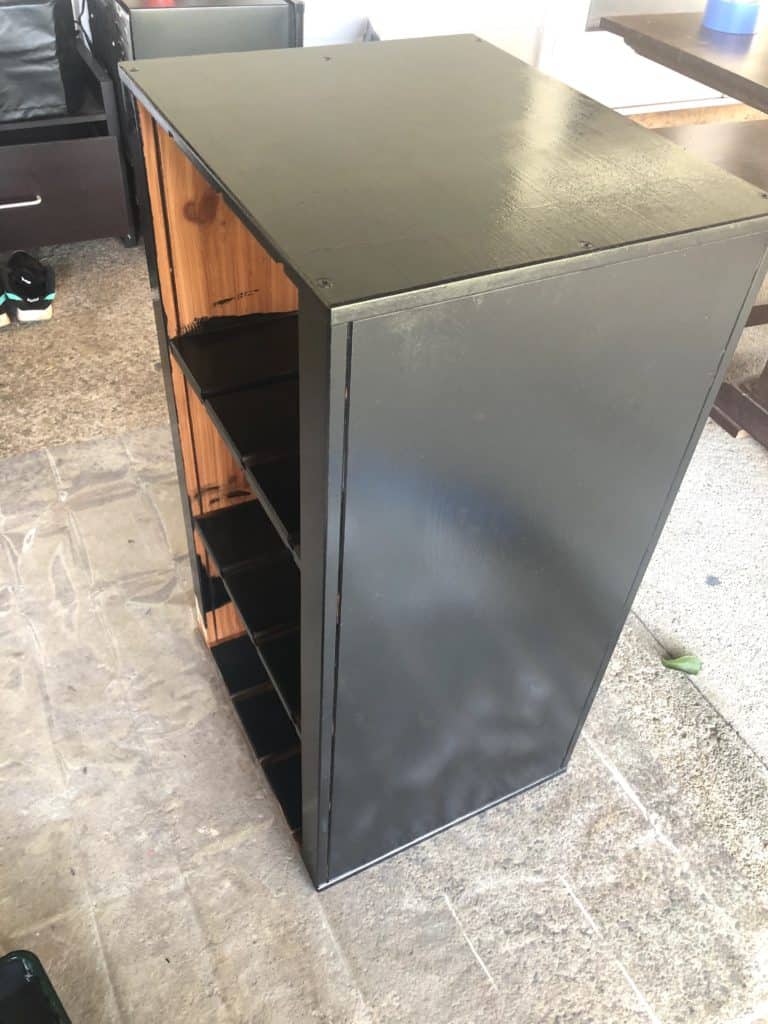
We had two the white IKEA trofast system that we bought a while back to start with for the design. this is the 39 x 17 3/8 x 37 ” Frame. A couple of months ago I lucked up and found the stained pine 37 x 20 1/2 ” frame at a consignment shop for a very low price. It had been stained darker, which was close to our floor color.
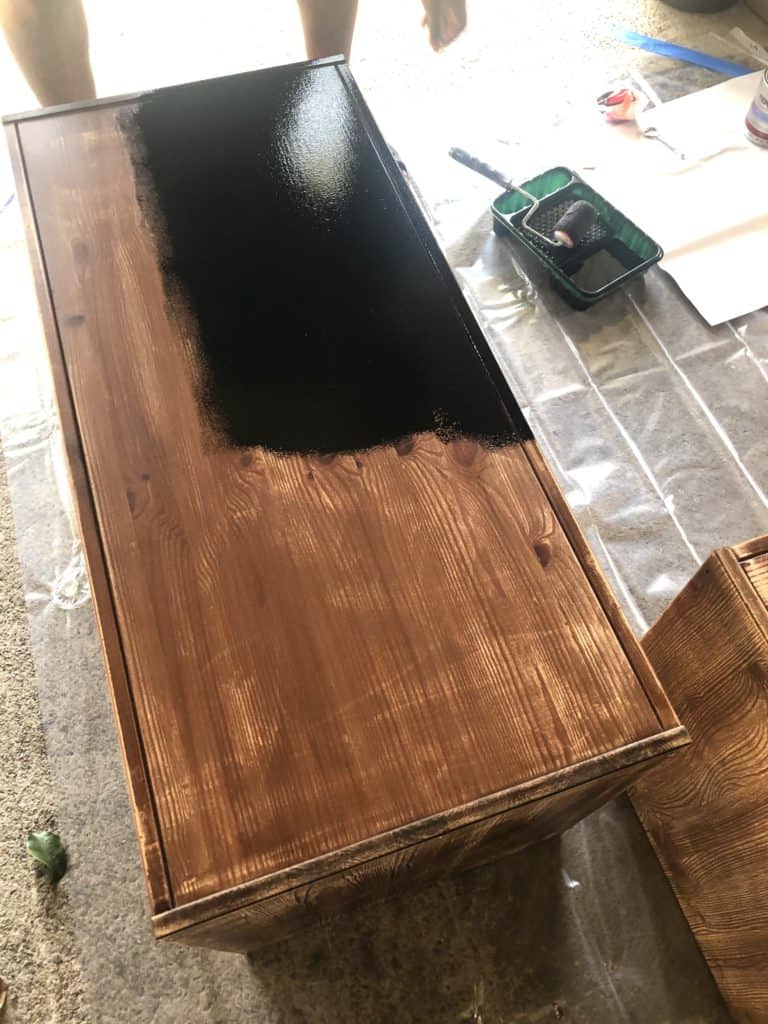
I made a decision to paint the frame black, so that we could match the decor in the rest of the house and also just clean it up a bit. We did not use a paint sealer, but you may want to if you are attempting to paint.
Take a look at what we did below! My husband sanded the frame first with a small sander. Next I cleaned it off, and then we completed two coats of Black Benjamin Moore paint!

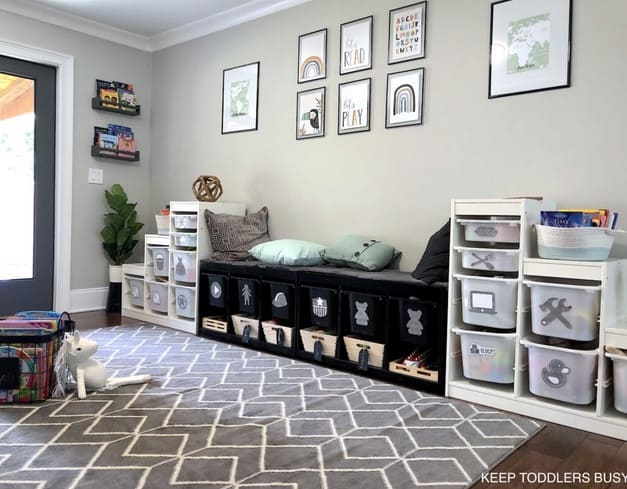
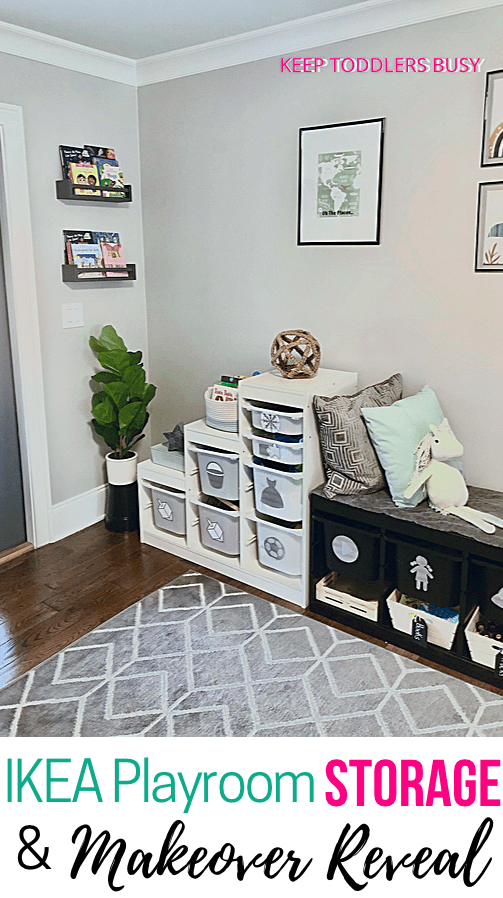
Book Storage, Rug, and Accessories
As I said before, my goal was to have a budget friendly playroom. I found some great items from places like Target and Amazon, and I reused some things as well.
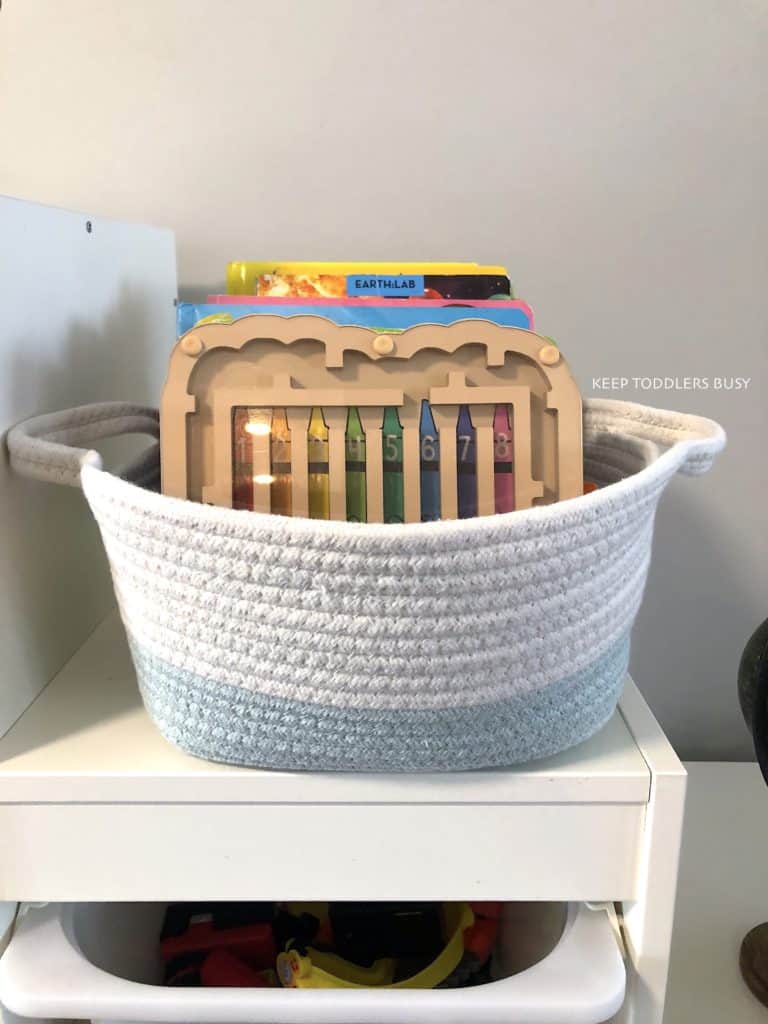
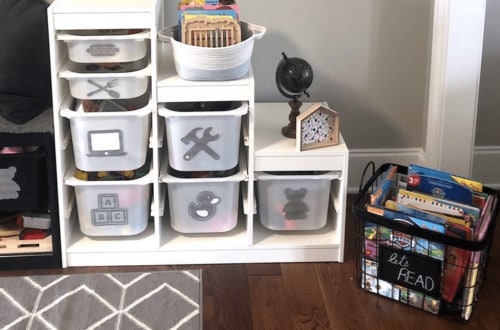
I got some really cute coiled rope baskets from Target to put books in on top of the bin structure. The last time I had nothing but cube boxes so I wanted to mix it up a it.
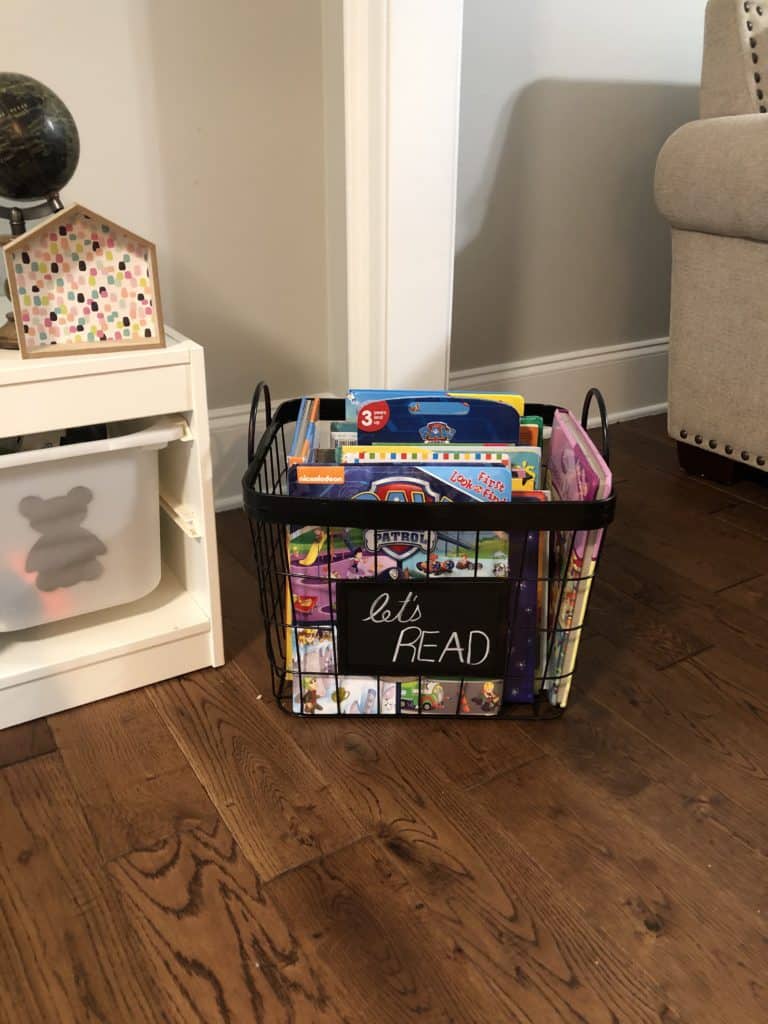
I used a separate metal chalk board basket to store the larger books. My goal was to keep black storage at a minimum since we already had black shelving, picture frames, and other accessories, but I just loved this crate and decided that black was the best color to paint it. I used Rustoleum black spray paint to update the look of the metal basket. Just make sure it’s big enough!
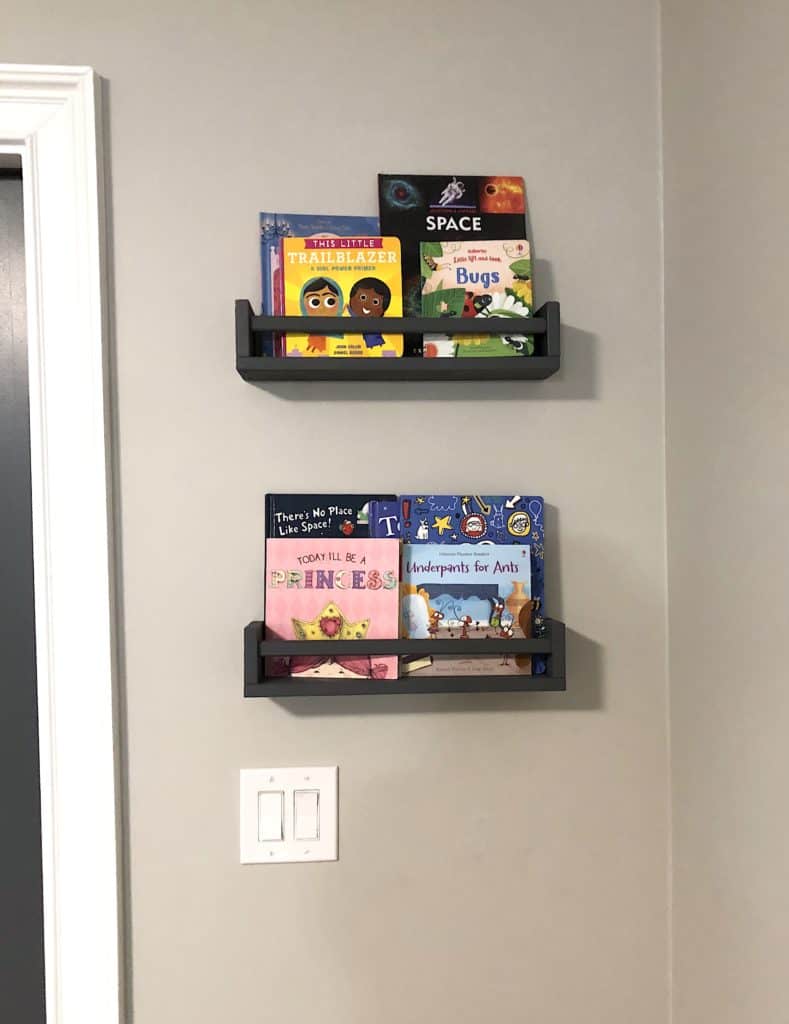
I also used some cute floating wall storage shelves for the books. I painted the Peppercorn gray with a left over paint sample from when we first moved into the house!
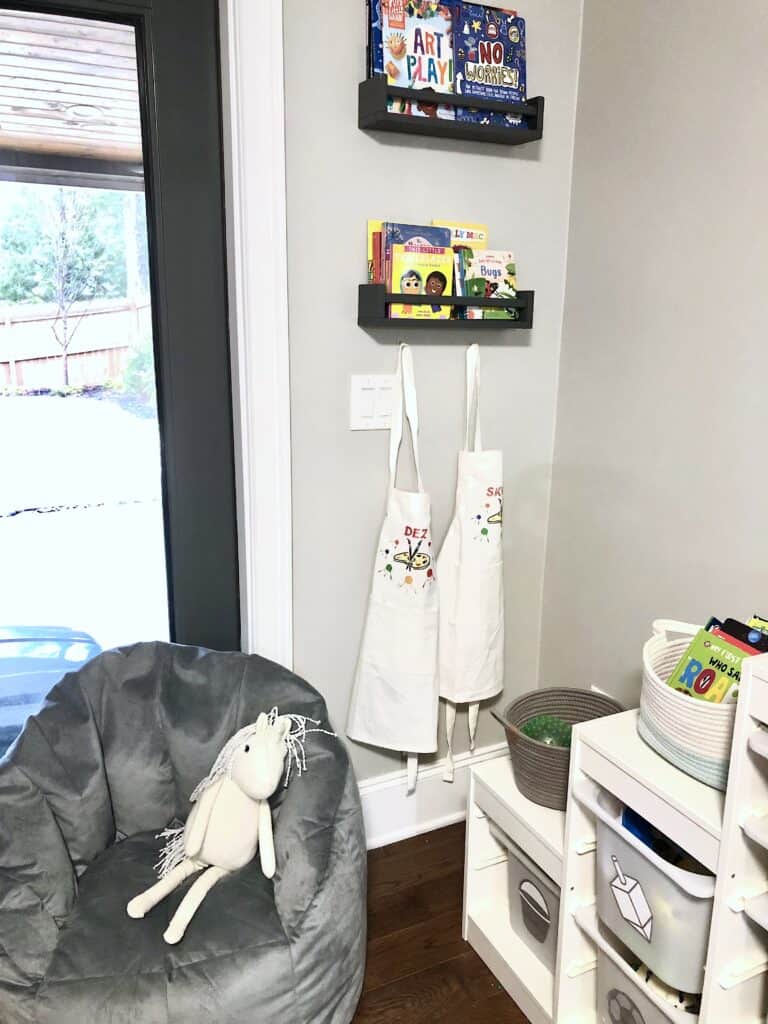
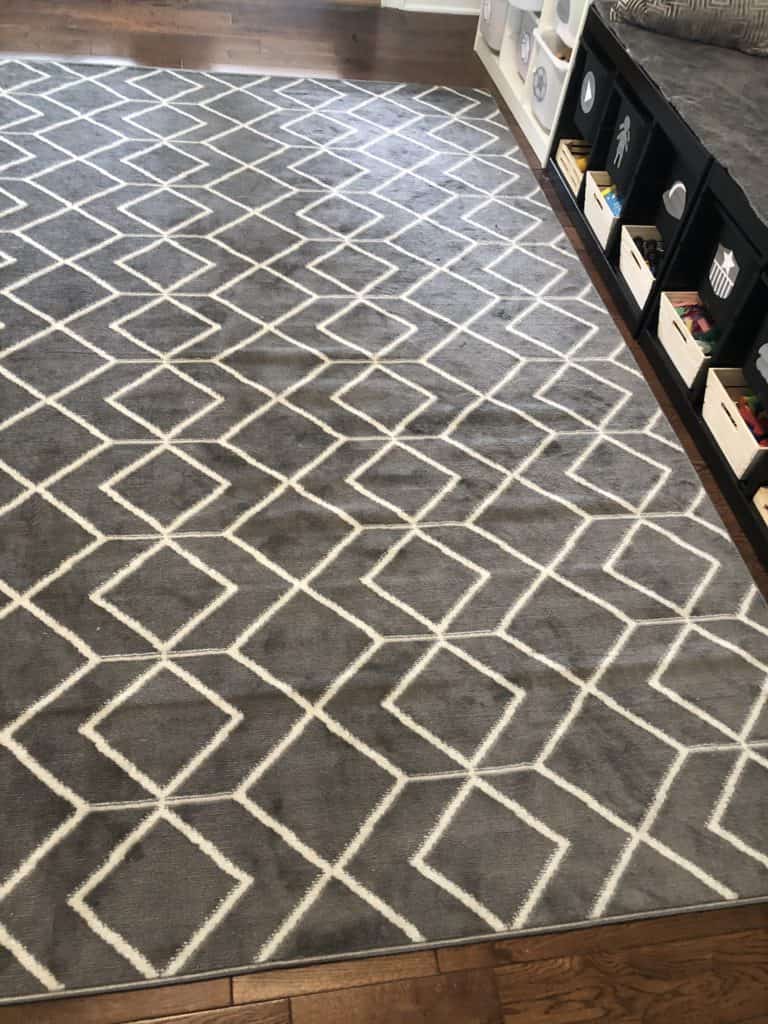
We lucked up on a very budget friendly 8×10 gray and white geometric rug from Wayfair! Great price for a great looking rug that helped pull the look of the whole room together. I just don’t believe in spending large amounts of money in kids rooms. They are kids, so things will get messed up, and I don’t want that truth to stress me out everyday.
I literally got the family sign and the miniature house from the Dollar Tree. Yes, you can find really cheap things as finishing touches to make a room look great 🙂
I used a gray blanket I had in the house with some double sided tape to add a little softness to the bench. I plan to add some cushions later.
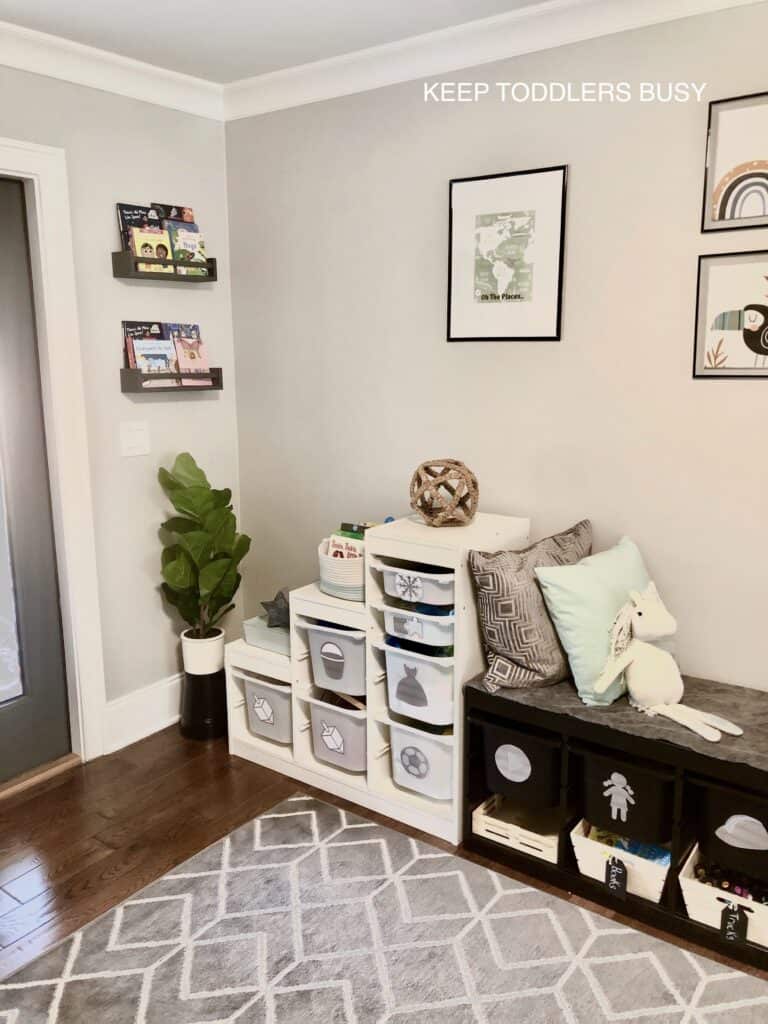
I also got the unfinished wood craft baskets at the bottom of the IKEA frame from the Target $3/$5 section in the front of the store (my favorite section).
And get this.. I MADE THE BIN LABELS! I made the labels using the Elements feature from Canva and it was so simple to print out on contact sticker paper! If you want to see how I did the labels, check out my tutorial on DIY Printables Labels using Canva!

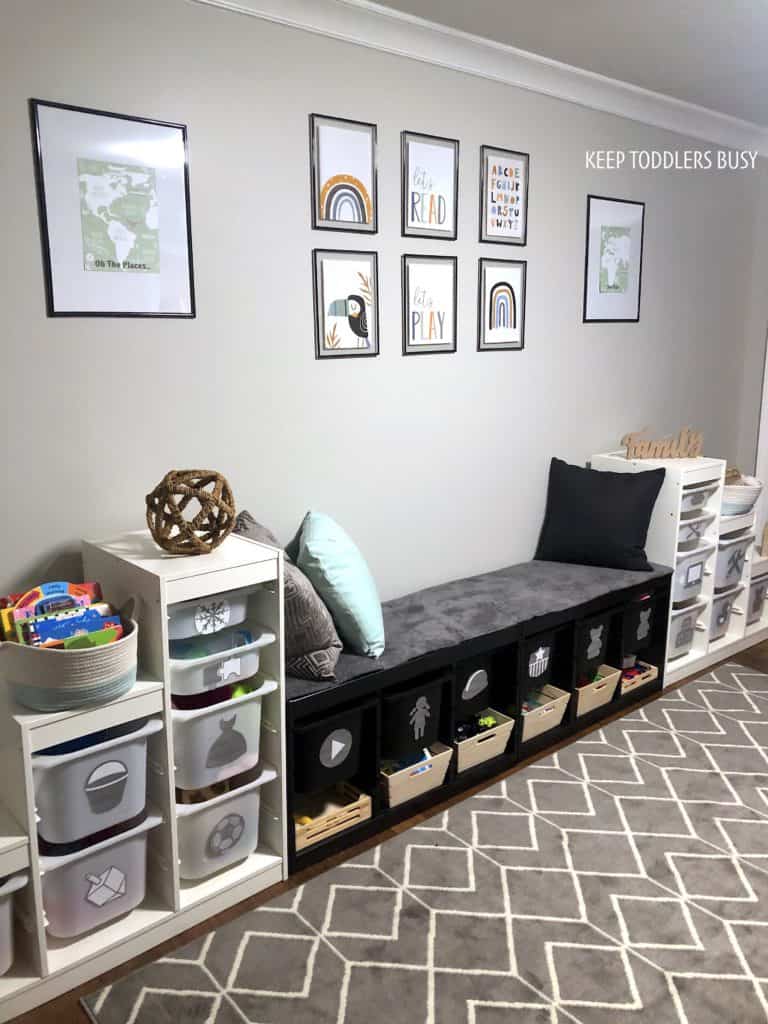
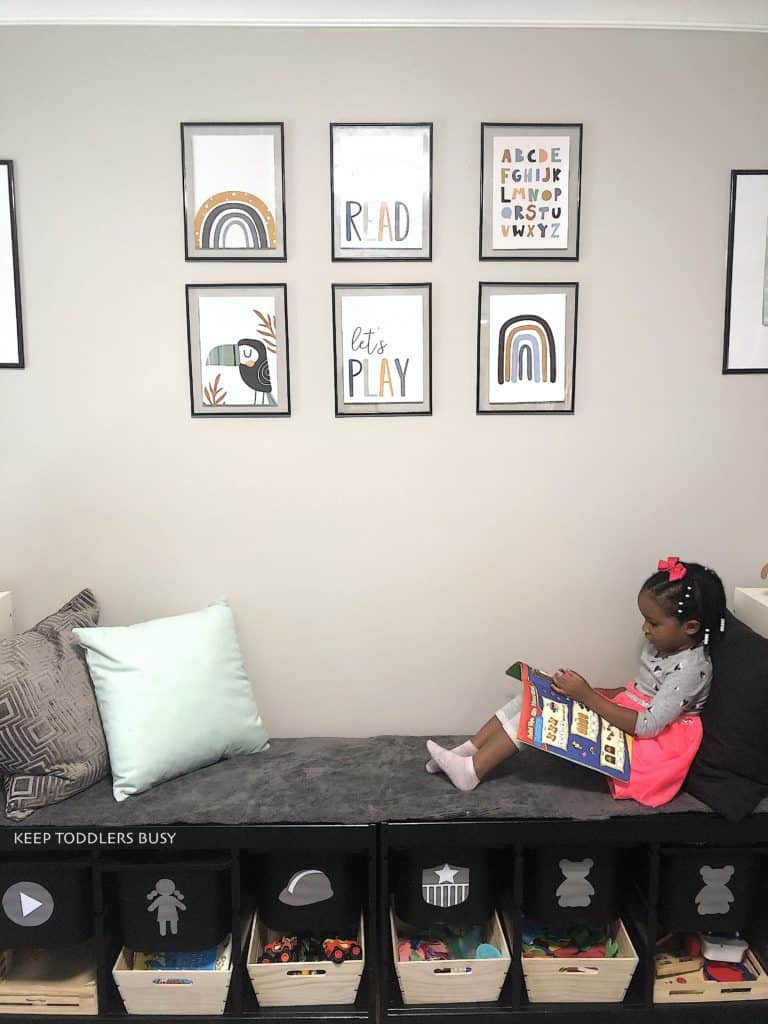
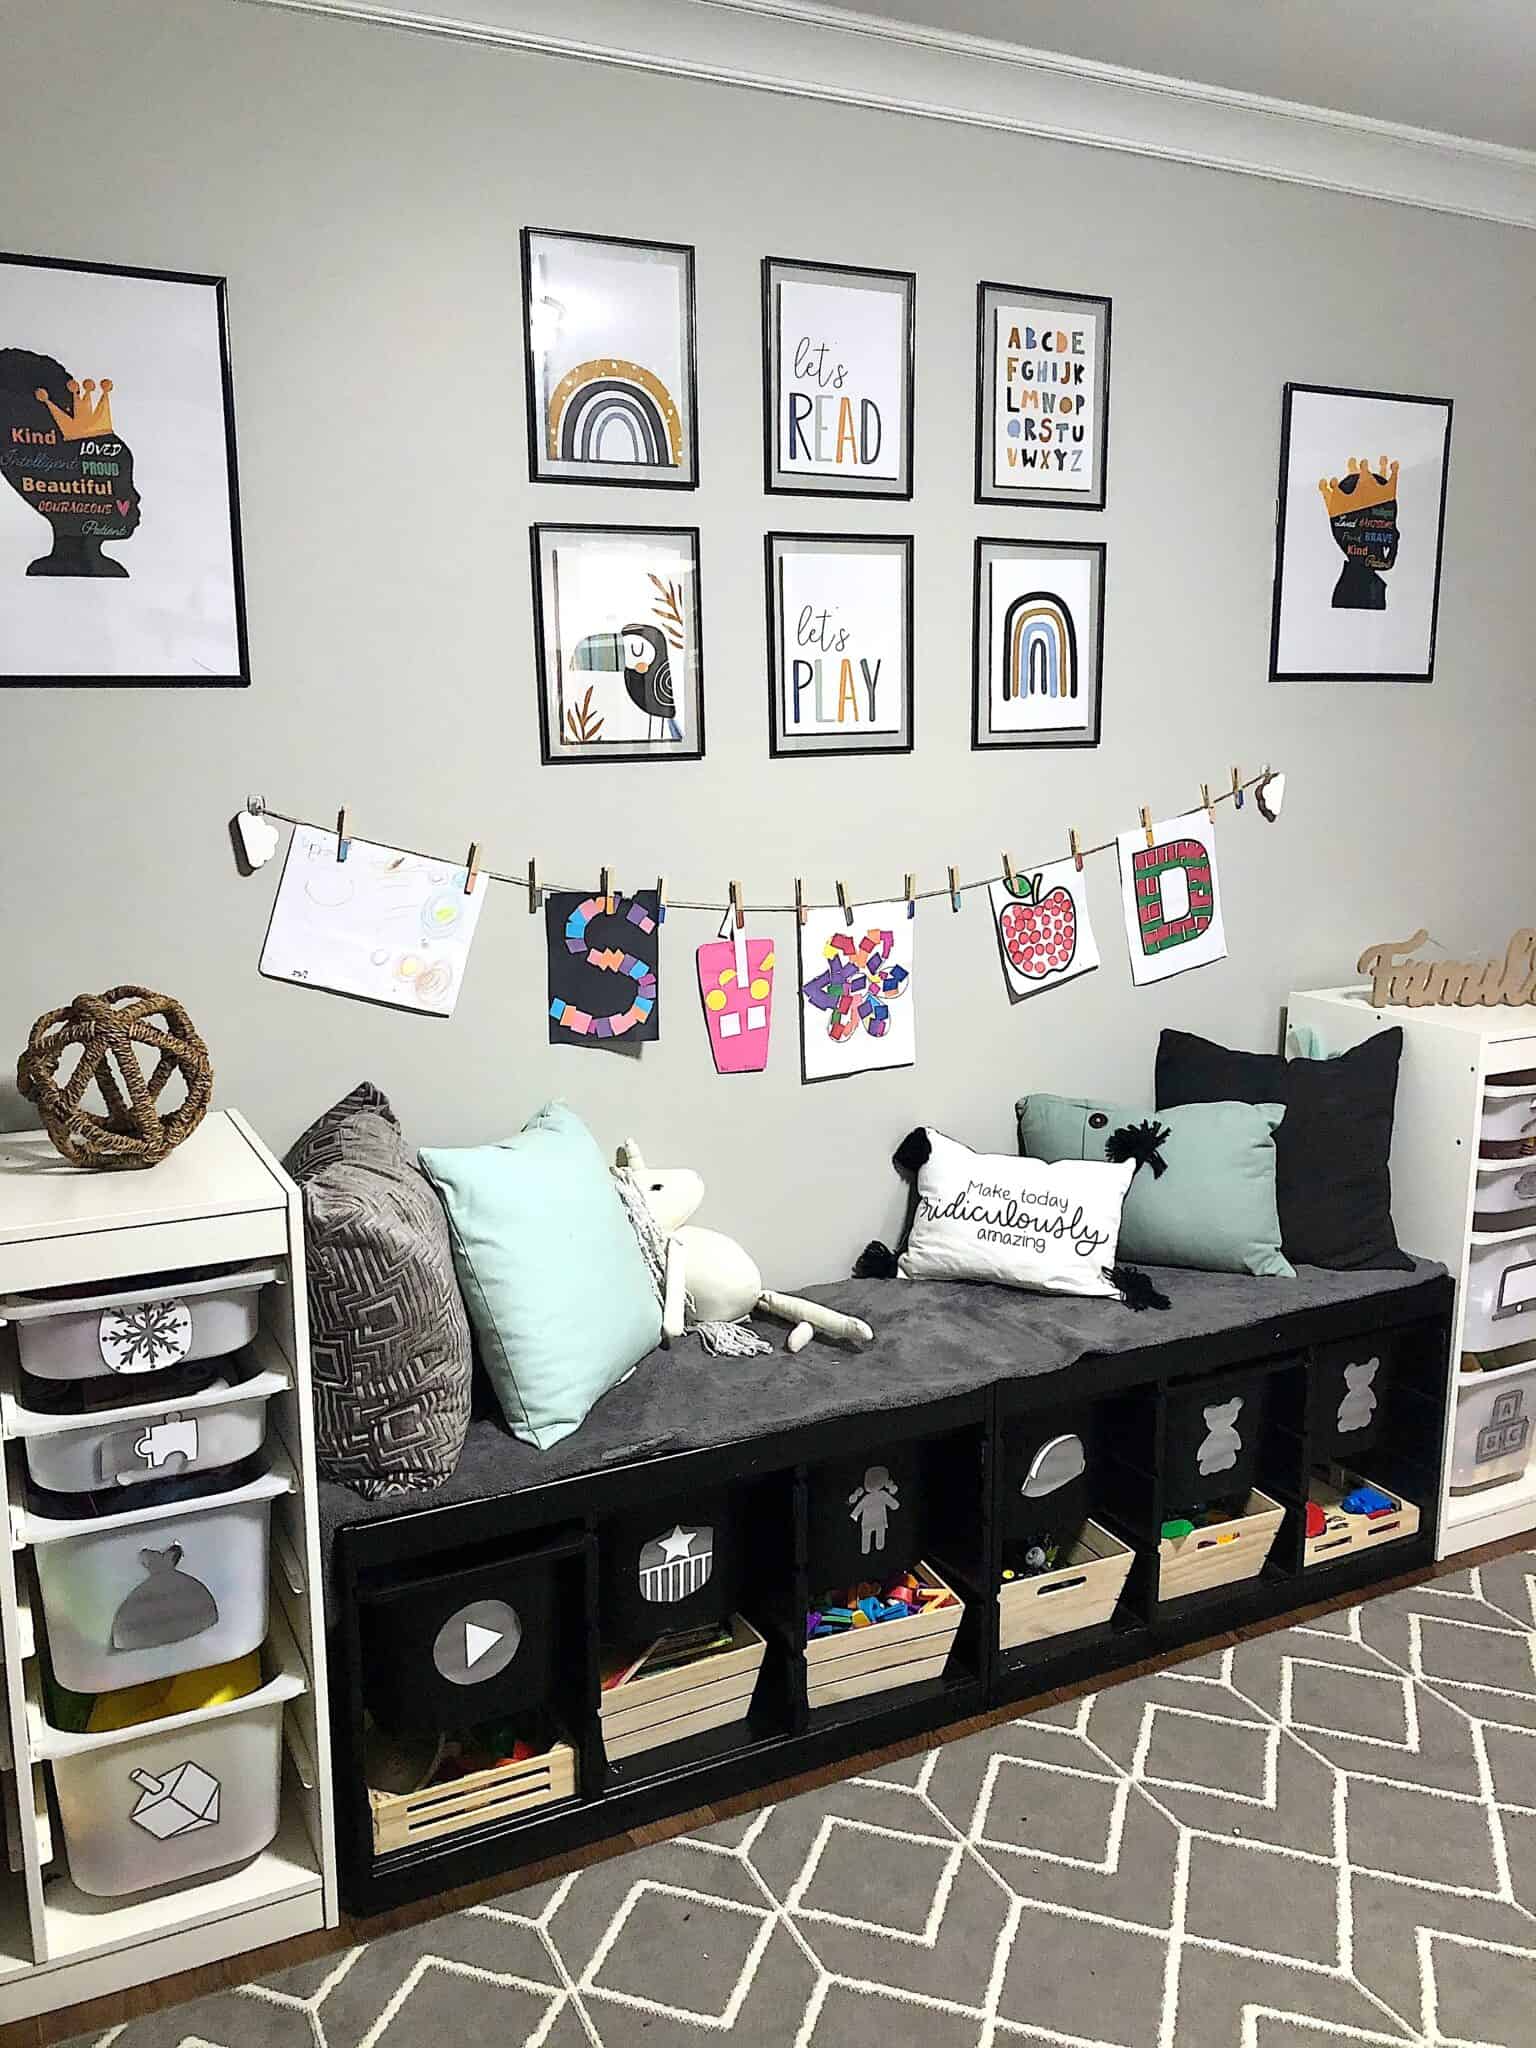
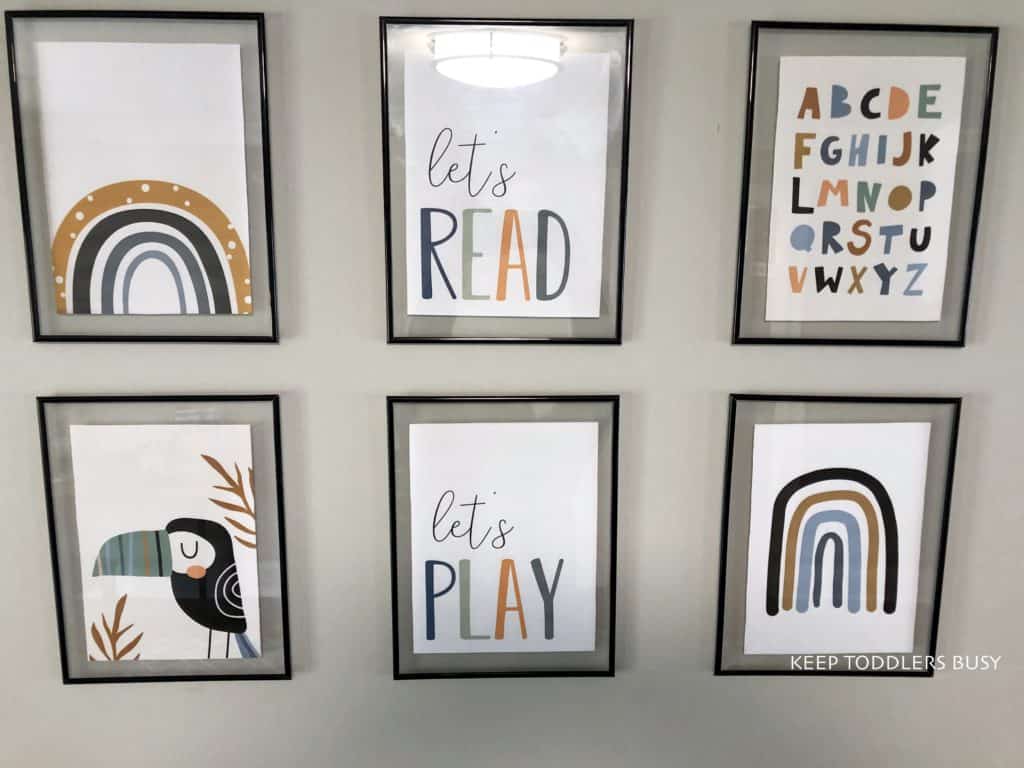
Our Wall Art
I love the little pictures that we printed out!! I LOVE that I could use this to give the kids some color, but still keep the same style.
Another great way to save money when you are redecorating is to print as much as you can. I used some frames that I had in the kids bedroom a over a year ago. You can actually get them for a a great price with Walmart Pickup.
I got the playroom prints from Etsy, and again, I MADE the map prints on Canva!
Check it out below and also check out my post on free wall art for kids!
So that’s it! That’s my kid’s new space in a nutshell. Now obviously they don’t always keep it this clean, but I am forever grateful that they have a space during this crazy time in the world. The little things really count and I think this IKEA playroom storage makeover came at a great time.
My hope is that someone can use this as inspiration!
If you would like some free playroom prints, make sure to sign up for our newsletter and get them sent to your inbox!
For your convenience I have put together all of the products we used in in our playroom makeover! (Some of them are affiliate links) I hope it helps if you are taking on a project! It seems like so much more when we list it out but we kept the price tag pretty reasonable.
- Wall color: Benjamin Moore Repose Gray
- Door color: Benjamin Moore Grizzle Gray
- Black Benjamin Moore Paint
- Rustoleum Black Spray Paint
- Geometric Rug
- Coiled Rope Baskets
- Black Metal Basket
- White Trofast Shelving
- Black Trofast Shelving
- Trofast Bins
- Floating Wall Shelves
- Wood Craft Boxes
- Black 10×13 Frames
- Black 16×20 Frames
- Printable Wall Art
- Pillows
- Globe Accessory
- Family sign
- Miniature House (Dollar Tree)
- Contact sticker paper
In the coming weeks please look out for Part Two of the playroom redesign! We will be including the study once our order comes in!
Make sure to hover over the top left of the image below and click “Pin” so you can save this post for later!!
Welcome to my blog! I am an activity mom of three and I have over 15 years of experience crafting, writing, designing and creating. My mission is to bring fun, balance and learning to your busy homes with activities, tips, inspiration, and organization!


17 Comments
Lex
I like your playroom it looks really good! I recently moved and since then have been working on making my new place look good. I like the idea of painting the furniture, I was planning on doing that to an old piece of furniture that doesn’t go with the rest of the room. You did a good job of painting that shelf. The pictures look really nice and well organized thanks for sharing!
Kayla
Thank you so much! I appreciate that. The paint made all the difference! Good luck with your new home!
roamy
Hello Kayla
Thanks so much for sharing, this is exactly what I`ve been looking for without even knowing it. A friend felt her daughter`s playroom storage was looking “tired” so we had arranged to go shopping for new storage next weekend.
But like for everyone else, money is tight, and purchasing even small items need proper planning. Thinking outside the box, I thought “what if we could just update and freshen out the present storage box” and that’s how I landed on your site.
After reading your post, what we need is some fresh paint, some DIY with fresh colorful fabrics(which I`m sure I have in my unused items storage box) and we`ll be ready to go.
I really appreciate you sharing this, it`s not always a question of buying new items, just some elbow grease, creative thinking, letting out our creative juices which is fun anyway, we can improve what we already have. What`s more, many times, we`ve saved money and created a more interesting piece for kids and grownups that boring plain stuff in the stores.
Kayla
Thank you for your comment! I couldn’t agree with you more! We didn’t want to spend too much money so we had to get creative! I’m so glad this was timely for you and I hope you are able to use some ideas and get your friend’s playroom redesigned!
Tanya
I love the playroom!! It looks so much brighter and so cozy!!
Kayla
Thank you so much Tanya! And thanks for visiting. I was pleased by how it turned out but when I looked at the pictures i could see the brightness
Caitlin Marsden
This is amazing. Thanks for sharing this blog. I have become a fan of your blogs. This blog is so interesting and informative.
Gregory Manchess
Thanks For Sharing with us.
Car Parking Shades
I really appreciate the time and effort you put into your blog posts.
It’s clear that you’re passionate about it.
Peter Martin
Love the transformation! The clever use of IKEA storage makes the playroom both stylish and functional. Great ideas for organizing kids’ toys while keeping the space fun and inviting!
Bruce Wayne
Nice
Car parking shades in dammam
I really appreciate the time and effort you put into your blog posts.
It
Mamawithlove
Wow, what an amazing transformation! Your IKEA playroom storage makeover looks fantastic and so well-organized. I love how you added personal touches and kept it budget-friendly. Can’t wait to see Part Two!
Kayla
Thank you!
Admin countryhome
I’m impressed by the details that you have on this site.You have a good point! I completely agree with what you said!!
Thanks for sharing your views…hopefully more people will check out
Admin Jadwelny
What a stunning transformation! The playroom looks so neat and personal, and you kept it budget-friendly. Can’t wait for Part Two!